

Amazon SageMaker supplies a single information and AI improvement setting to find and construct together with your information. This unified platform integrates performance from present AWS Analytics and Synthetic Intelligence and Machine Studying (AI/ML) companies, together with Amazon EMR, AWS Glue, Amazon Athena, Amazon Redshift, and Amazon Bedrock.
Organizations have to effectively handle information property whereas sustaining governance controls of their information marketplaces. Though handbook approval workflows stay essential for delicate datasets and manufacturing techniques, there’s an growing want for automated approval processes with much less delicate datasets. On this publish, we present you find out how to automate subscription request approvals inside SageMaker, accelerating information entry for information shoppers.
Conditions
For this walkthrough, you will need to have the next conditions:
- An AWS account – In case you don’t have an account, you’ll be able to create one. The account ought to have permission to do the next:
- Create and handle SageMaker domains
- Create and handle IAM roles
- Create and invoke Lambda features
- SageMaker area – For directions to create a website, seek advice from Create an Amazon SageMaker Unified Studio area – fast setup.
- A demo undertaking – Create a demo undertaking in your SageMaker area. For directions, see Create a undertaking. For this instance, we select All capabilities within the undertaking profile part.
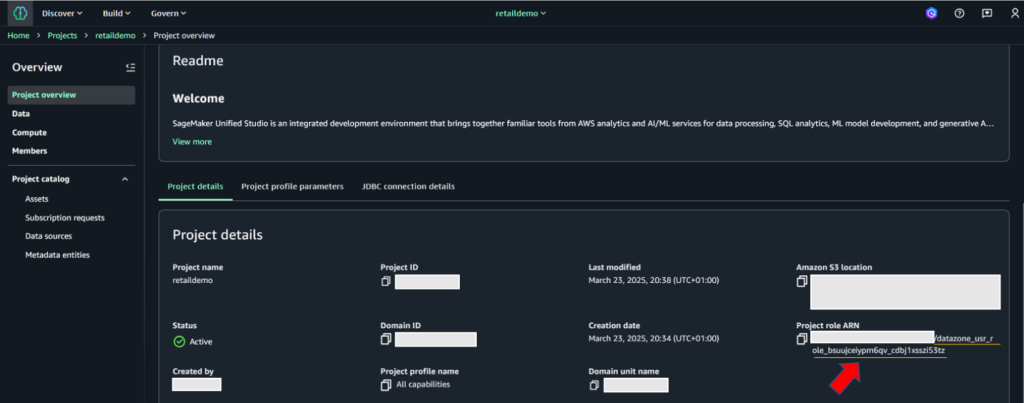
- SageMaker area ID, undertaking ID, and undertaking position ARN – These will probably be utilized in later steps to offer permissions for present datasets and sources, and computerized subscription approval code. To retrieve this data, go to the Venture particulars tab on the undertaking particulars web page on the SageMaker console.
- AWS CLI put in – It’s essential to have the AWS Command Line Interface (AWS CLI) model 2.11 or later.
- Python put in – It’s essential to have Python model 3.8 or later.
- IAM permissions – Register because the person with administrative entry
- Lambda permissions – Configure the suitable IAM permissions for the Lambda execution position. The next code is a pattern position used for testing this resolution. Earlier than implementing this IAM coverage in your setting, present the values on your particular AWS Area and account ID. Regulate them based mostly on the precept of least privilege. To be taught extra about creating Lambda execution roles, seek advice from Defining Lambda perform permissions with an execution position.
Answer overview
Understanding the subscription and approval workflow in Amazon SageMaker is essential earlier than diving deep into customized workflow resolution. After an asset is revealed to the SageMaker catalog, information shoppers can uncover property. When an information client discovers property in SageMaker catalog, they request entry to the asset, by submitting a subscription request with enterprise justification and meant use case. The request enters a pending state and notifies the information producer or asset proprietor for assessment. The information producer evaluates the request based mostly on governance insurance policies, client credentials, and enterprise context. The information producer can settle for, reject, or request extra data from the information client. Upon acceptance, SageMaker triggers the AcceptSubscriptionRequest occasion and begins automated entry provisioning. After a subscription is accepted, a subscription fulfilment course of will get kicked off to facilitate entry to the asset, for the information producer. SageMaker integrates deeply with AWS Lake Formation to handle fine-grained permissions. When a subscription is authorised, SageMaker mechanically calls Lake Formation APIs to grant particular database, desk, and column-level permissions to the subscriber’s IAM position. Lake Formation acts because the central permission engine, translating subscription approvals into precise information entry rights with out handbook intervention. The system provisions and updates resource-based insurance policies on information sources. As soon as the provisioning completes, the information client can instantly entry subscribed information via question engines like Athena, Redshift, or EMR, with Lake Formation imposing permissions at question time.
By default, subscription requests to a printed asset require handbook approval by an information proprietor. Nevertheless, Amazon SageMaker helps computerized approval of subscription requests at asset degree: when publishing an information asset, you’ll be able to select to not require subscription approval. On this case, all incoming subscription requests to that asset are mechanically authorised. Let’s first define the step-by-step course of for disabling computerized approval on the asset degree.
Configure computerized approval at asset degree:
To configure computerized approval, information producers can comply with the steps under.
- Log in to SageMaker Unified Studio portal as information producer. Navigate to Belongings and choose the goal asset
- Select Belongings → Decide the asset, which you want to configure for computerized approval.
- On the asset particulars web page, find Edit Subscription settings in the appropriate pane.
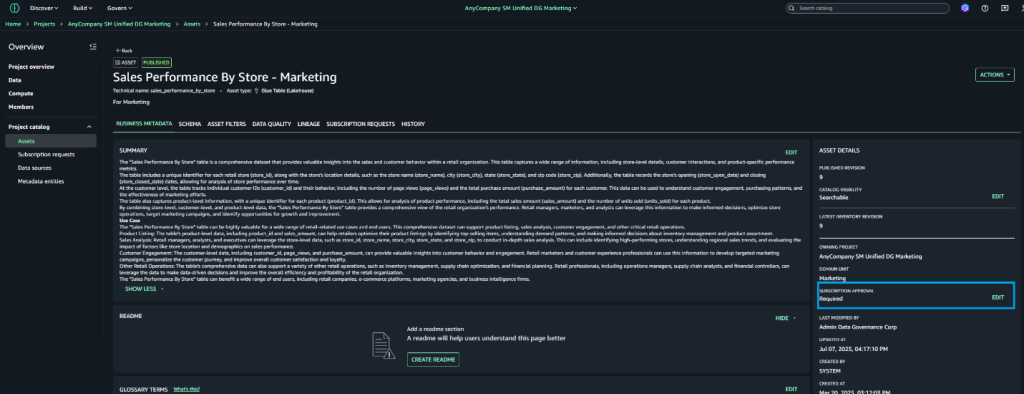
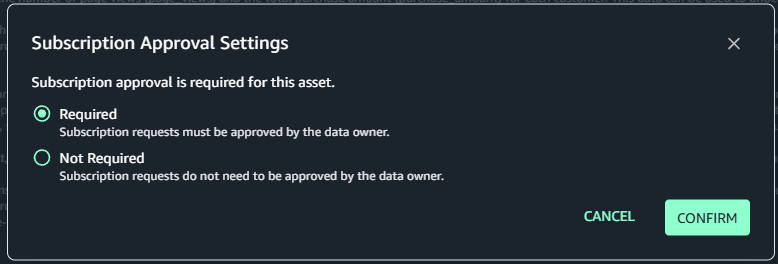
- Select Edit subsequent to Subscription Required
- Choose Not Required within the dialogue field
- Verify your choice
Customise SageMaker’s subscription workflow:
Whereas handbook approval workflow stays important for manufacturing environments and delicate information dealing with, organizations search to streamline and automate approvals for lower-risk environments and non-sensitive datasets. To realize this project-level automation, we are able to improve SageMaker’s native approval workflow via a customized event-driven resolution. This resolution leverages AWS’s serverless structure, combining utilizing AWS Lambda, Amazon EventBridge guidelines, and Amazon Easy Notification Service (Amazon SNS) to create an automatic approval workflow. This customization permits organizations to keep up governance whereas decreasing administrative overhead and accelerating the event cycle in non-critical environments. The event-driven method ensures real-time processing of approval requests, maintains audit trails, and will be configured to use completely different approval guidelines based mostly on undertaking traits and information sensitivity ranges.
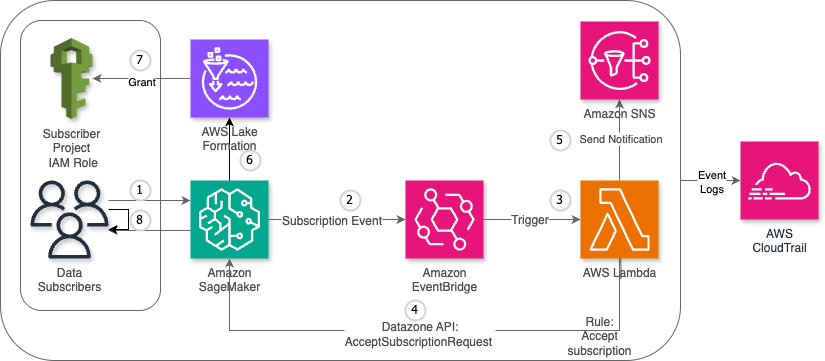
The customized workflow consists of the next steps:
- The information client submits a subscription request for a printed information asset.
- SageMaker detects the request and generates a subscription occasion, which is mechanically despatched to EventBridge.
- EventBridge triggers the designated Lambda perform.
- The Lambda perform sends an
AcceptSubscriptionRequestAPI name to SageMaker. - The perform additionally sends a notification via Amazon SNS.
- AWS Lake Formation processes the authorised subscription and updates the related entry management lists (ACLs) and permission units.
- Lake Formation grants entry permissions to the information client’s undertaking AWS Id and Entry Administration (IAM) position.
- The information client now has licensed entry to the requested information asset and might start working with the subscribed information.
The next diagram illustrates the high-level structure of the answer.
Key advantages
This resolution makes use of AWS Lambda and Amazon EventBridge to automate SageMaker subscription requests approvals, delivering the next advantages for organizations and end-users:
- Scalability – Mechanically handles excessive volumes of subscription requests
- Price-efficiency – Pay-as-you-go method with no idle useful resource prices
- Minimal upkeep – Serverless elements require no infrastructure administration
- Versatile triggering – Helps event-driven, scheduled, and handbook invocation modes
- Audit compliance – Complete logging and traceability via AWS CloudTrail
Step-by-step process
This part outlines the detailed course of for implementing a customized subscription request approval workflow in Amazon SageMaker
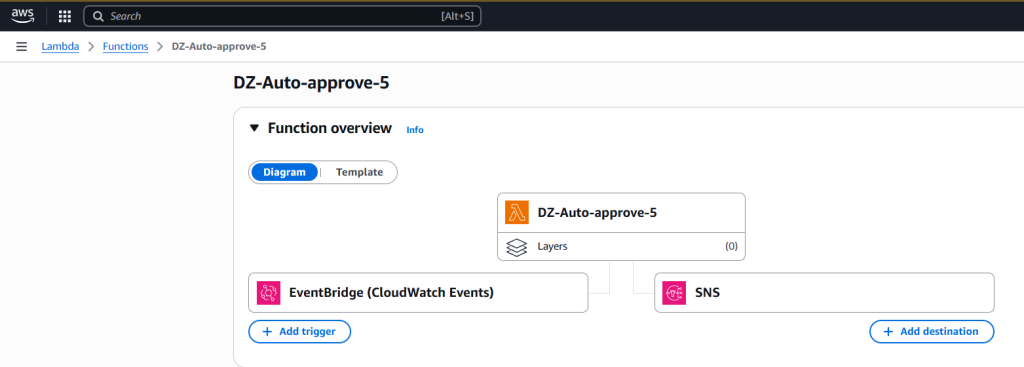
Create Lambda perform
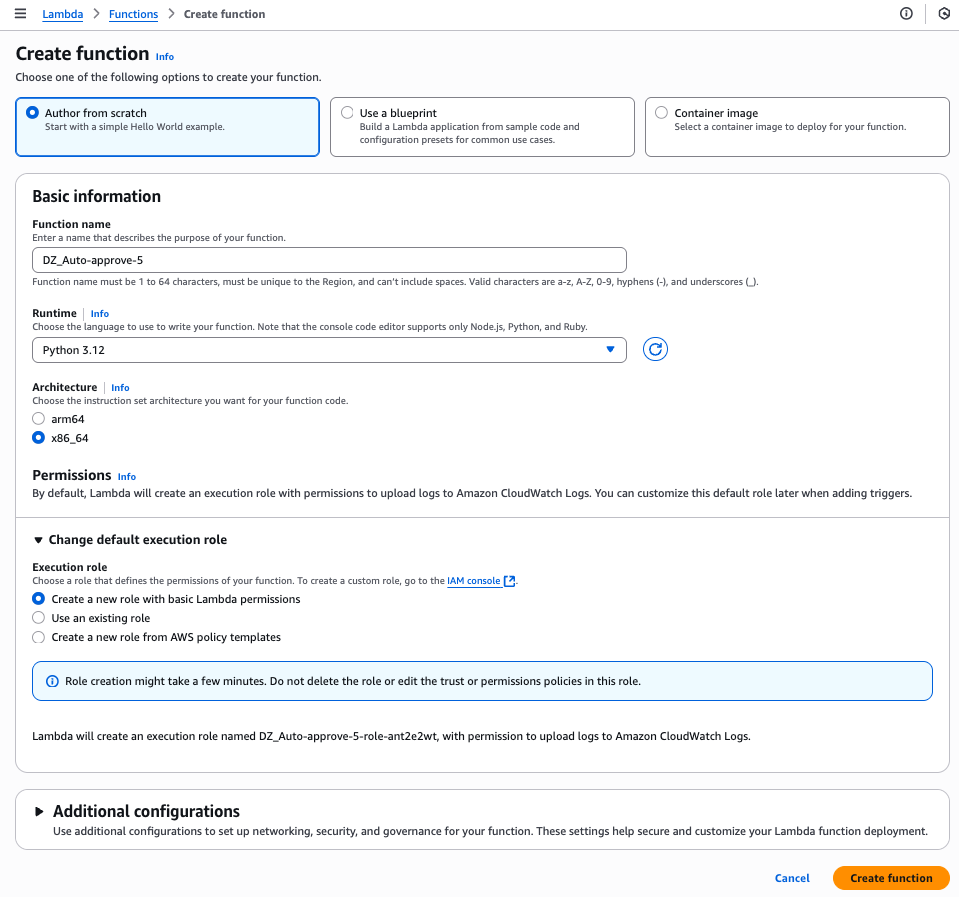
Full the next steps to create your Lambda perform:
- On the Lambda console, select Features within the navigation pane.
- Select Create perform.
- Choose Writer from scratch.
- For Perform title, enter a reputation for the perform.
- For Runtime, select your runtime (for this publish, we use Python model 3.9 or later).
- Select Create perform.
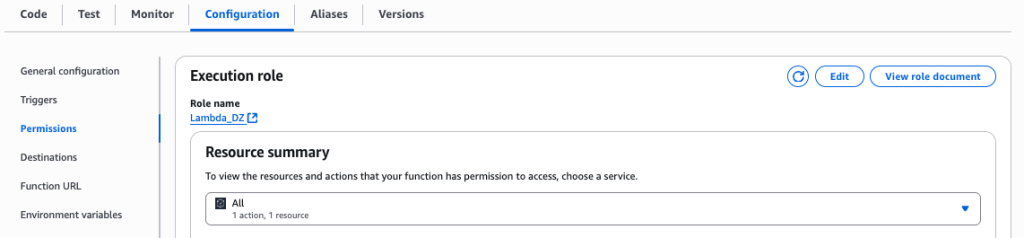
- On the Lambda perform web page, select the Configuration tab after which select Permissions.
- Notice the execution position to make use of when configuring the SageMaker undertaking.
Create SNS subject
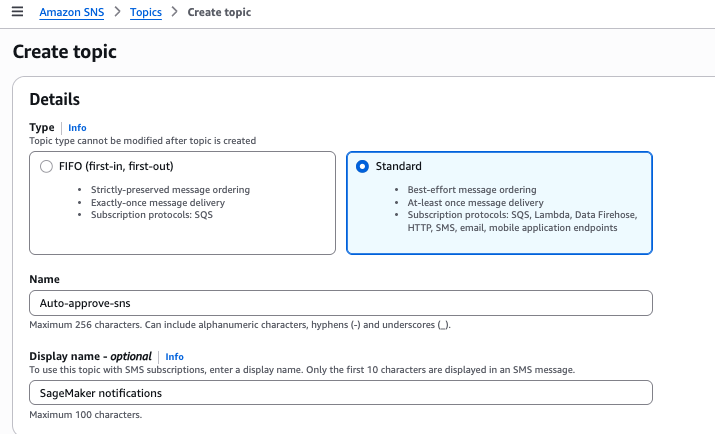
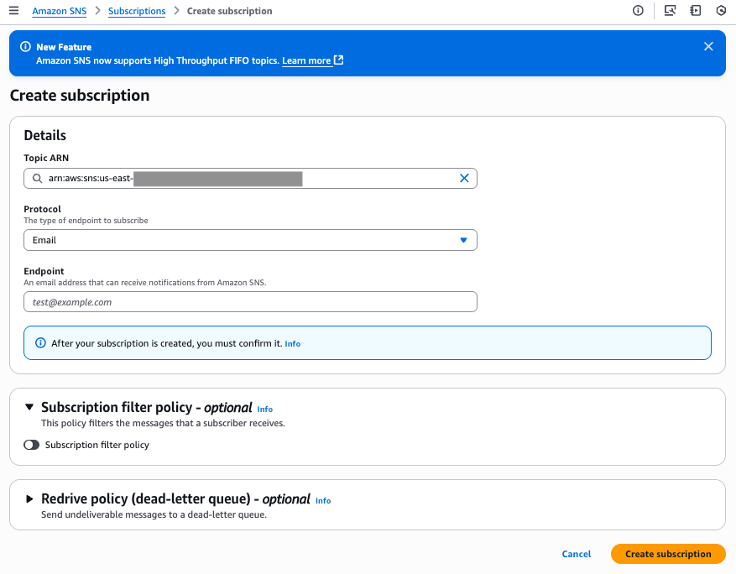
For this resolution, we create SNS subject. Full the next steps to create the SNS subject for computerized approvals:
- On the Amazon SNS console, select Matters within the navigation pane.
- Select Create subject.
- For Sort, choose Commonplace.
- For Identify, enter a reputation for the subject.
- Select Create subject.
- On the SNS subject particulars web page, observe the SNS subject Amazon Useful resource Identify (ARN) to make use of later within the Lambda perform.
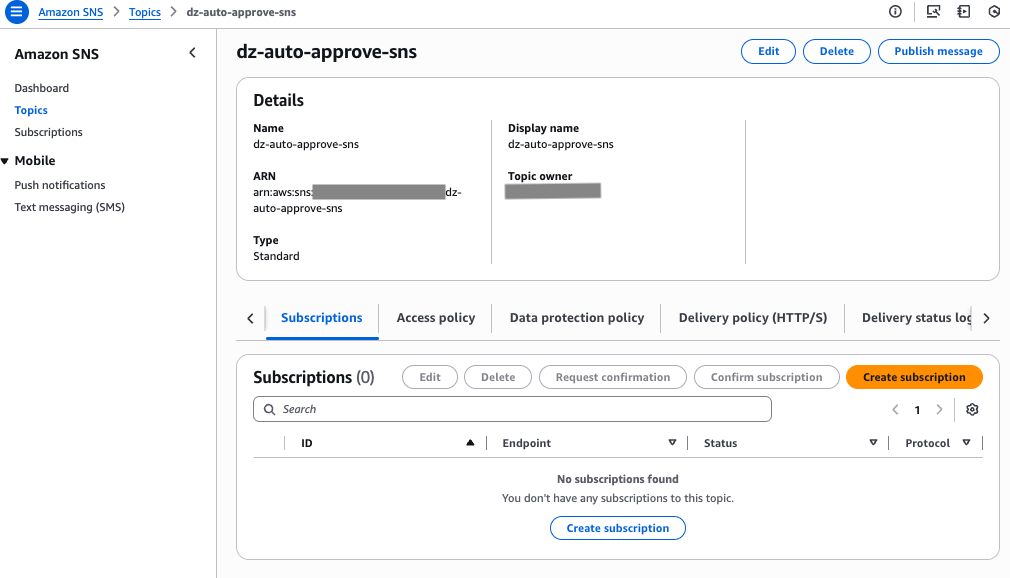
- On Subscription tab, select Create Subscription.
- For Protocol, select E-mail.
- For Endpoint, enter electronic mail deal with of Information shoppers.
Create EventBridge rule
Full the next steps to create an EventBridge rule to seize subscription request occasions:
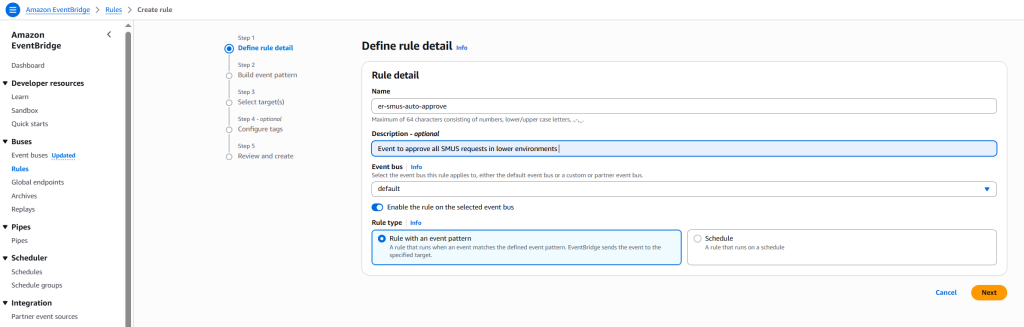
- On the EventBridge console, select Guidelines within the navigation pane.
- Select Create rule.
- For Identify, enter a reputation for the rule.
- For Rule kind, choose Rule with occasion sample.
This selection permits the automated subscription approval workflow to be triggered when a subscription request is initiated. Alternatively, you’ll be able to choose Schedule to schedule the rule to set off frequently. Confer with Making a rule that runs on a schedule in Amazon EventBridge to be taught extra. - Select Subsequent.
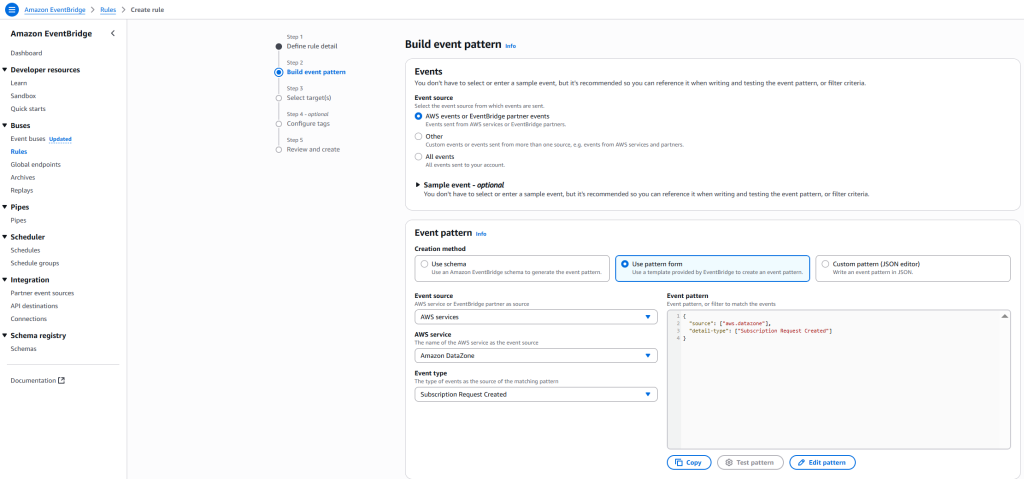
- For Occasion supply, choose AWS occasions or EventBridge companion occasions.
- For Creation methodology, choose Use sample kind
- For Occasion supply, choose AWS companies
- For AWS service, choose DataZone.
- For Occasion kind, choose Subscription Request Created.
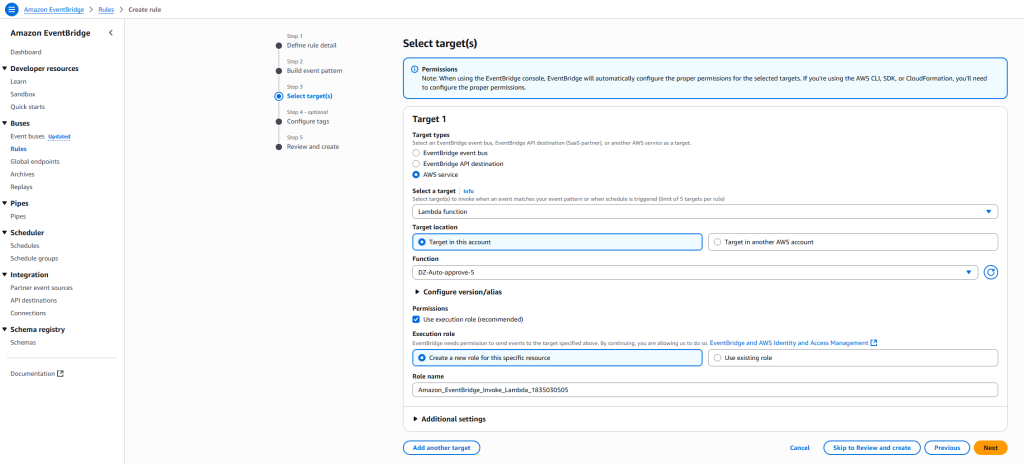
- Configure your goal to route occasions to each the Lambda perform and SNS subject.
- Select Subsequent.
- For this publish, skip configuring tags and select Subsequent.

- Overview the settings and select Create rule.
Configure automation workflow
Full the next steps to configure the automation workflow:
- On the Lambda console, go to the perform you created.
- Configure the EventBridge rule to set off the Lambda perform
- Configure the vacation spot as SNS subject for occasion notification.
Configure code in Lambda perform
Full the next steps to configure your Lambda perform:
- On the Lambda console, go to the perform you created.
- Add the next code to your perform. Present the area ID, undertaking ID, and SNS subject ARN that you simply famous earlier.
- Select Take a look at to check the Lambda perform code. To be taught extra about testing Lambda code, seek advice from Testing Lambda features within the console.
- Select Deploy to deploy the code.
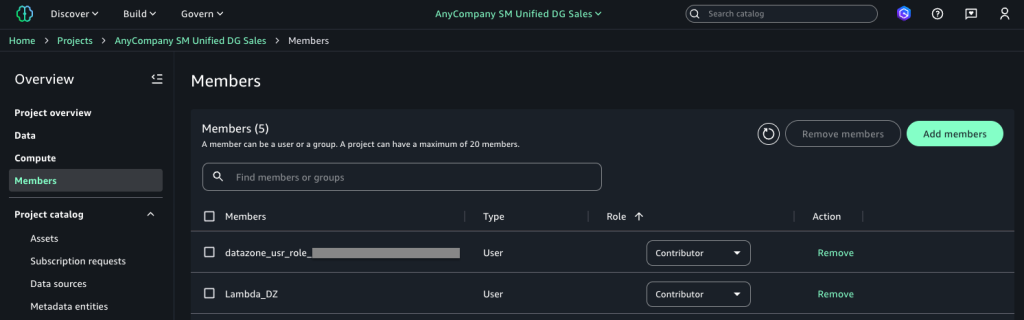
Configure Lambda and undertaking execution roles in SageMaker
Full the next steps:
- In SageMaker Unified Studio, go to your publishing undertaking.
- Select Members within the navigation pane.
- Select Add members.
- Add the Lambda execution position and undertaking execution roles as Contributor.
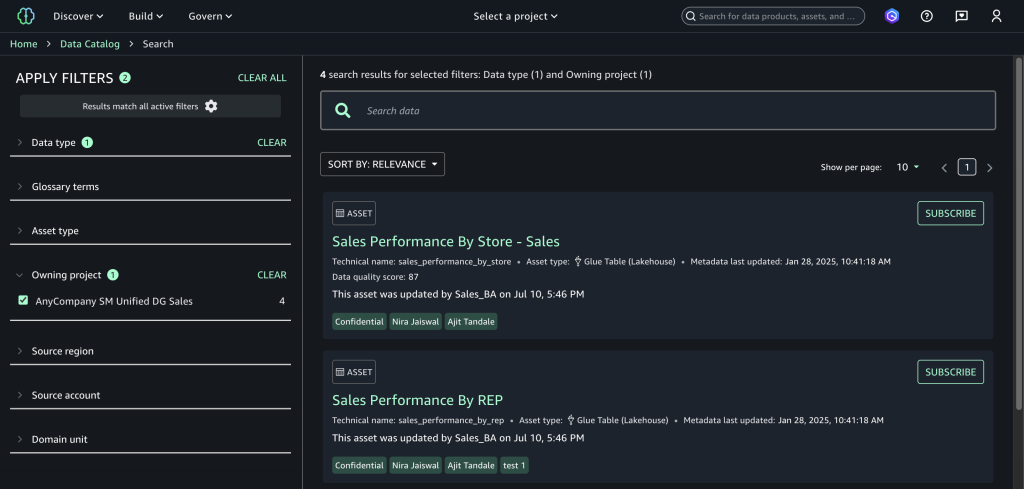
Take a look at the answer
Full the next steps to check the answer:
- In SageMaker Unified Studio, navigate to the information catalog and select Subscribe on the configured asset to provoke a subscription request.
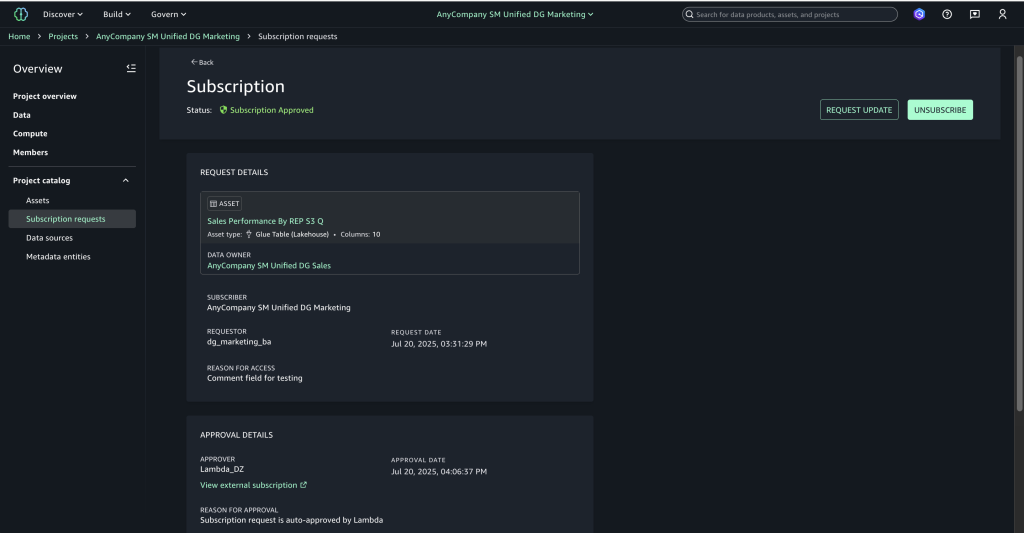
- Select Subscription requests within the navigation pane to view the outgoing requests and select the Permitted tab to confirm computerized approval.
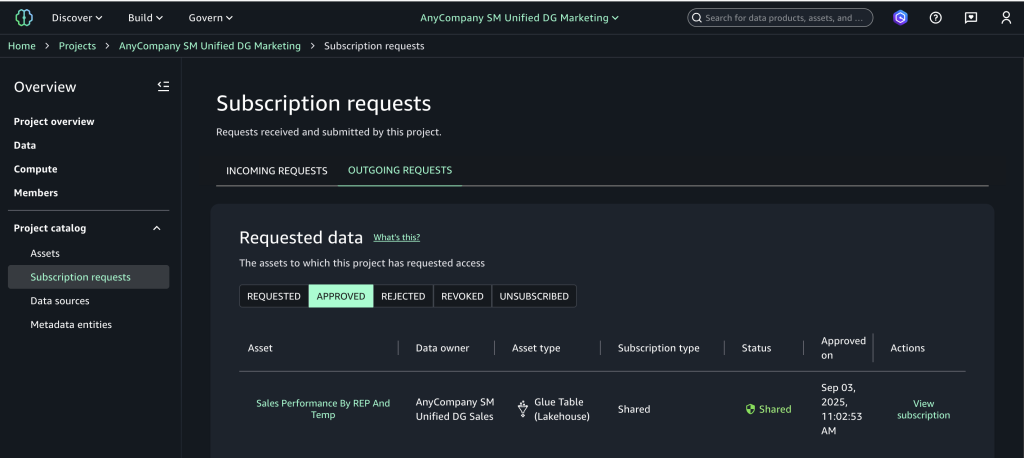
- Select View subscription to substantiate the approver seems because the Lambda execution position with “Auto-approved by Lambda” as the rationale.
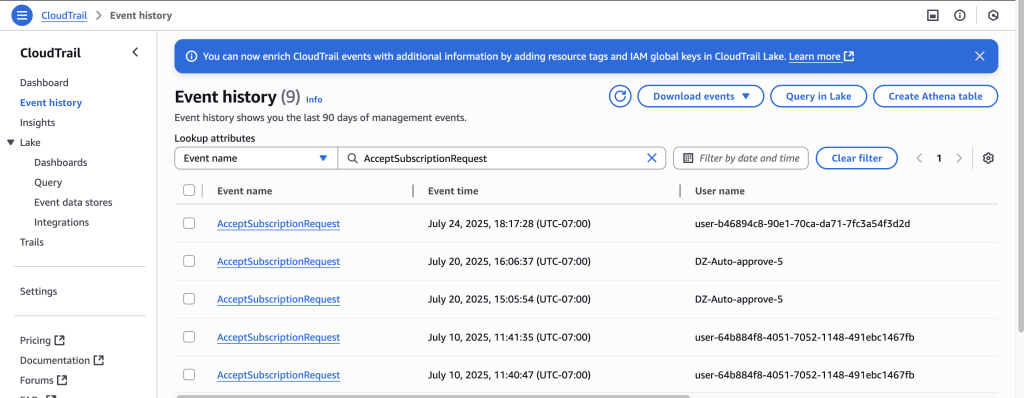
- On the CloudTrail console, select Occasion historical past to view the occasion you created and assessment the automated approval audit path.
Clear up
To keep away from incurring future prices, clear up the sources you created throughout this walkthrough. The next steps use the AWS Administration Console, however you can even use the AWS CLI.
- Delete the SageMaker area. To make use of the AWS CLI, run the next instructions:
- Delete the SNS matters. To make use of the AWS CLI, run the next command:
- Delete the Lambda perform. To make use of the AWS CLI, run the next command:
Conclusion
Combining an event-driven structure with SageMaker creates an automatic, cost-effective resolution for information governance challenges. This serverless method mechanically handles information entry requests whereas sustaining compliance, so organizations can scale effectively as their information grows. The answer mentioned on this publish may also help information groups entry insights quicker with minimal operational prices, making it a wonderful selection for companies that want fast, compliant information entry whereas conserving their techniques lean and environment friendly.
To be taught extra, go to the Amazon SageMaker Unified Studio web page.
Concerning the authors