")
This yr, DJI has continued to launch drones at a really aggressive tempo. With the vacation season upon us, maybe you may have or shall be receiving a brand-new Air 3S.
If you’re new to drones and have simply acquired or shall be receiving a brand new Air 3S, we’ll undergo the steps wanted to get first-time drone homeowners ready to fly.
On this article and video tutorial we shall be contemplating the next:
- What’s within the numerous combos
- Charging all the batteries
- Inserting SD playing cards
- Downloading and putting in the DJI Fly Software program
Combos/Packages
The Air 3S comes within the following Packages:
DJI Air 3S Fly Extra Combo (DJI RC 2)
- DJI Air 3S
- DJI RC 2 Distant Controller
- Clever Flight Battery x 3
- Battery Charging Hub
- ND Filter Set (ND8/32/128)
- DJI Shoulder Bag
- Spare Propellers (Pair) x 3
- Kind-C to Kind-C PD Cable
- Gimbal Protector
DJI Air 3S Fly Extra Combo (DJI RC-N3)
- DJI Air 3S
- DJI RC-N3 Distant Controller
- Clever Flight Battery x 3
- Battery Charging Hub
- ND Filter Set (ND8/32/128)
- DJI Shoulder Bag
- Spare Propellers (Pair) x 3
- Kind-C to Kind-C PD Cable
- Gimbal Protector
DJI Air 3S (DJI RC-N3)
- DJI Air 3S
- DJI RC-N3 Distant Controller
- Clever Flight Battery x 1
- Spare Propellers (Pair) x 1
- Kind-C to Kind-C PD Cable
- RC Cable (USB-C Connector)
- RC Cable (Lightning Connector)
- Gimbal Protector
Charging the Batteries
Though getting a brand new drone might be thrilling, the very first thing that should be carried out is to cost all the batteries that come within the numerous packages and combos, together with the distant controller batteries.
Be aware: the DJI RC-N2 additionally works with the Air 3S.
RC-N3, and DJI RC 2 Controllers
Though your new RC may need roughly half energy when initially opened, it is very important absolutely cost the distant controller.

As is the case with earlier newer DJI drones, the Air 3 included, the Air 3S doesn’t embody an influence adaptor. A DJI 65 or 100-watt charger is recommended, though we’ve got discovered many manufacturers of 65-watt and 100-watt PD chargers to work properly.
Be aware: For ease of use, a 100-watt PD charging hub will permit one to cost the distant controller and battery hub (in case you have a Flymore Combo) concurrently.

To cost the usual RC-N3 controller, plug the included USB-C cable into the underside of the RC. The LED indicator lights will start to blink, signifying the distant controller is charging.
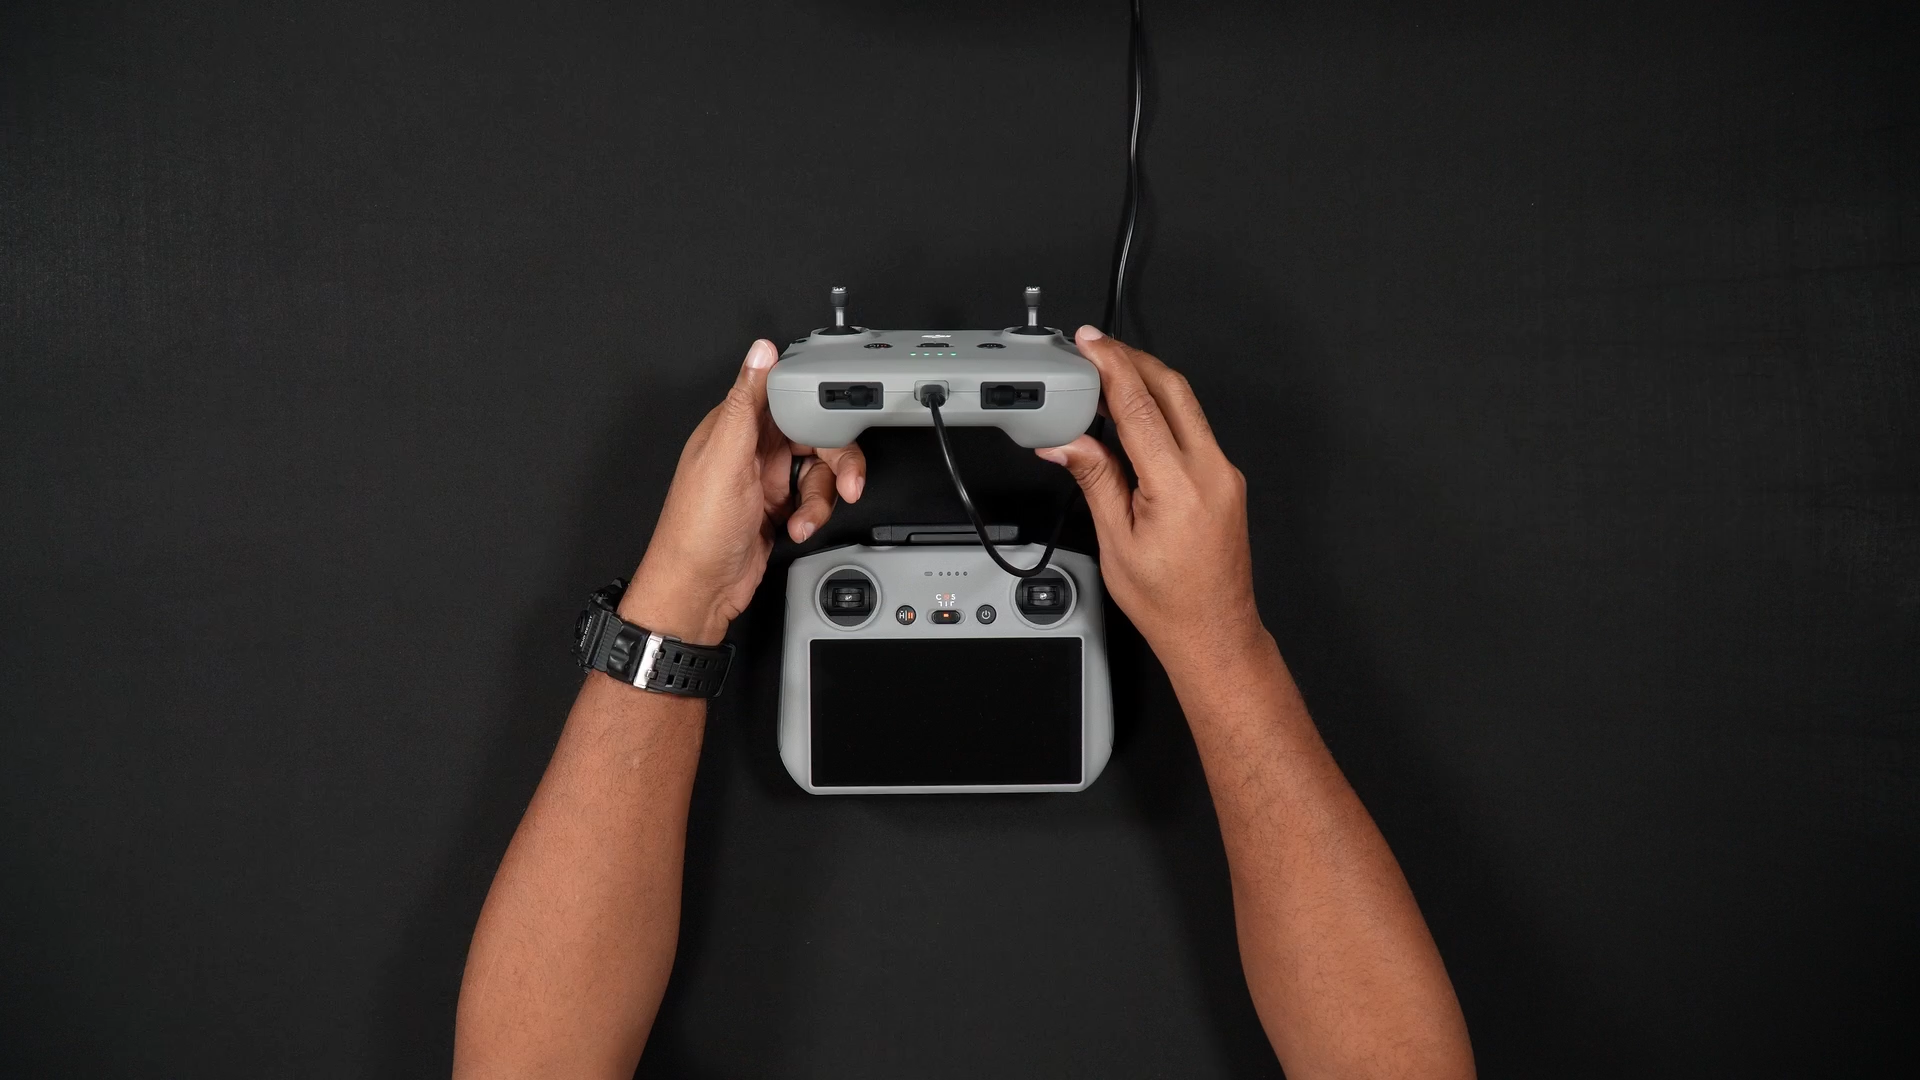

To cost the DJI RC 2, with the 5.5″ built-in display screen, the USB-C charging port is situated within the port to the proper of the Micro SD card slot. Plug the USB-C cable in and the controller will start charging.

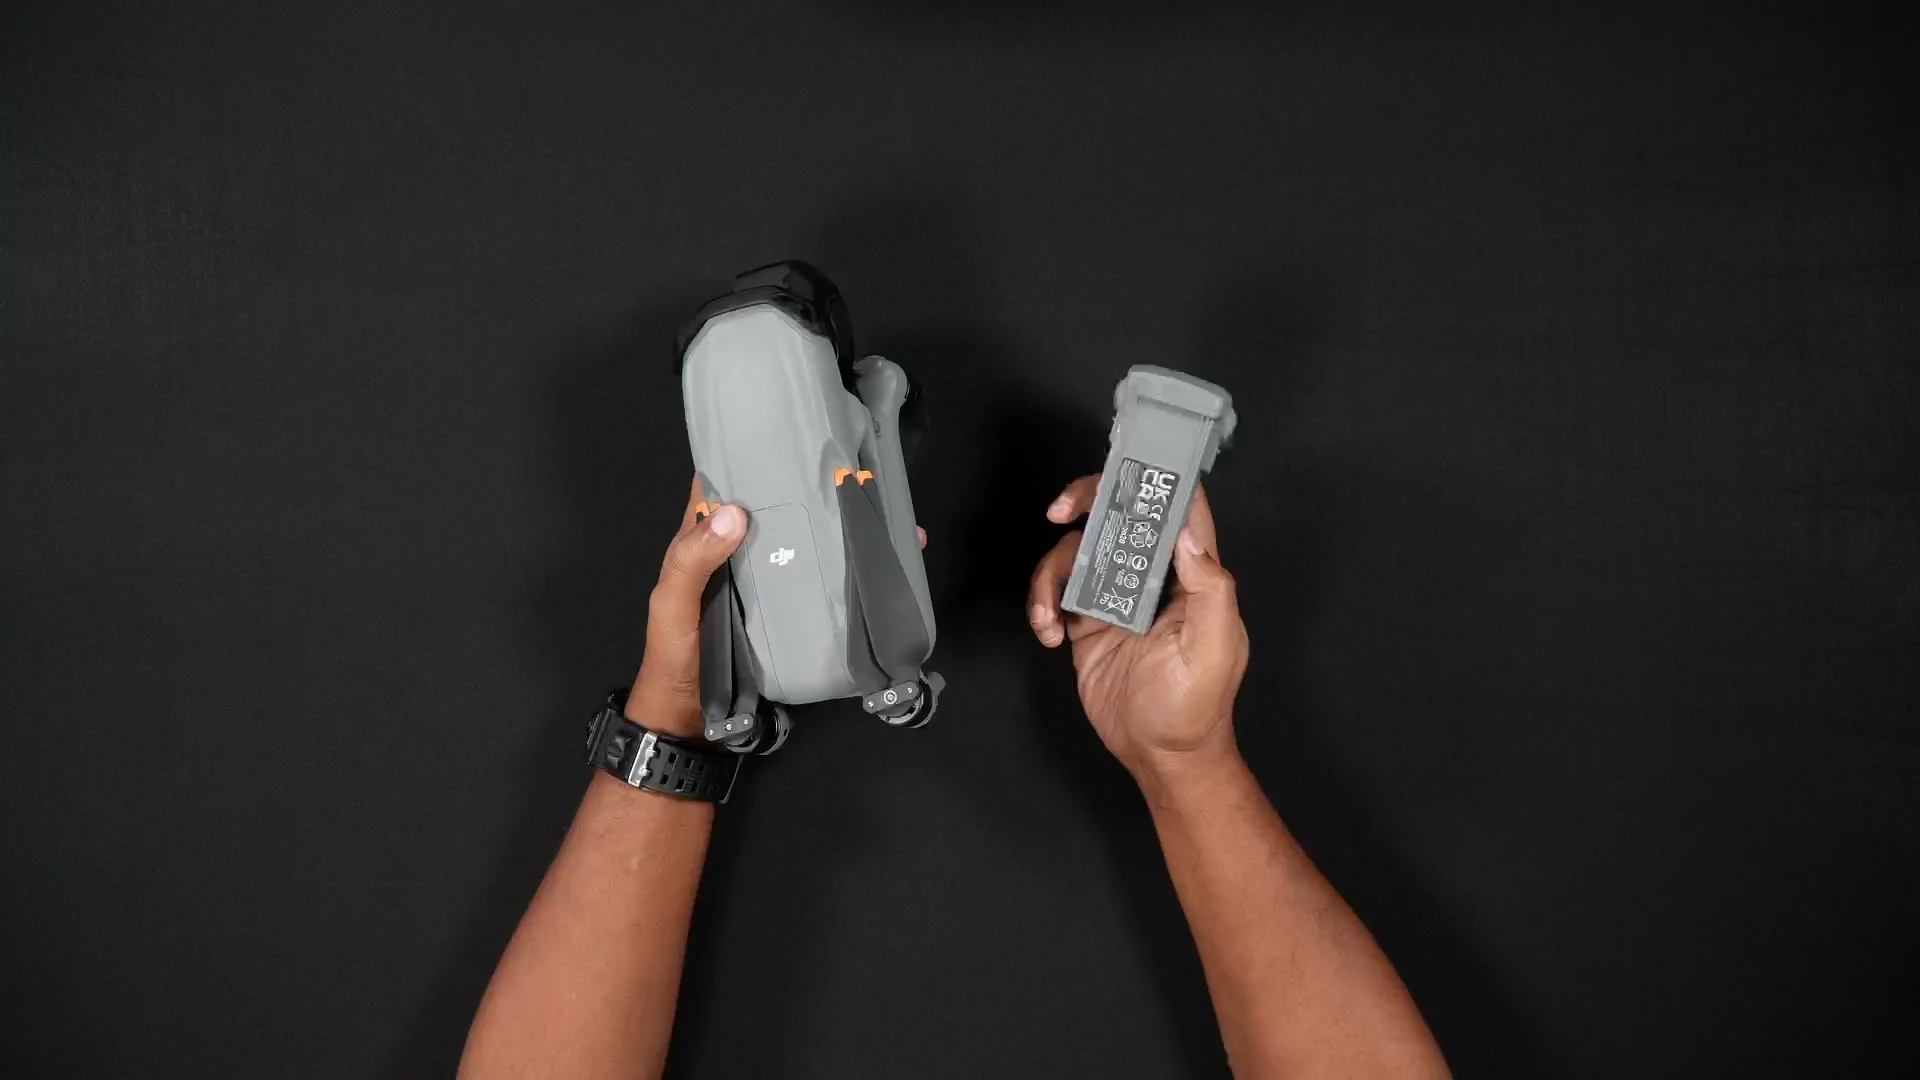
Air 3S Batteries
Fortunately the Air 3S makes use of the identical batteries because the Air 3. Nevertheless, the Air 3S batteries have one minute much less flight time than the Air 3. The Air 3S has 45 minutes of flight time, down from the 46 minutes discovered with the Air 3.

In fact, flight circumstances and different elements will see outcomes fluctuate in total most flight occasions.
With the Air 3S, as with the Air 3, there are 2 methods to cost the batteries.
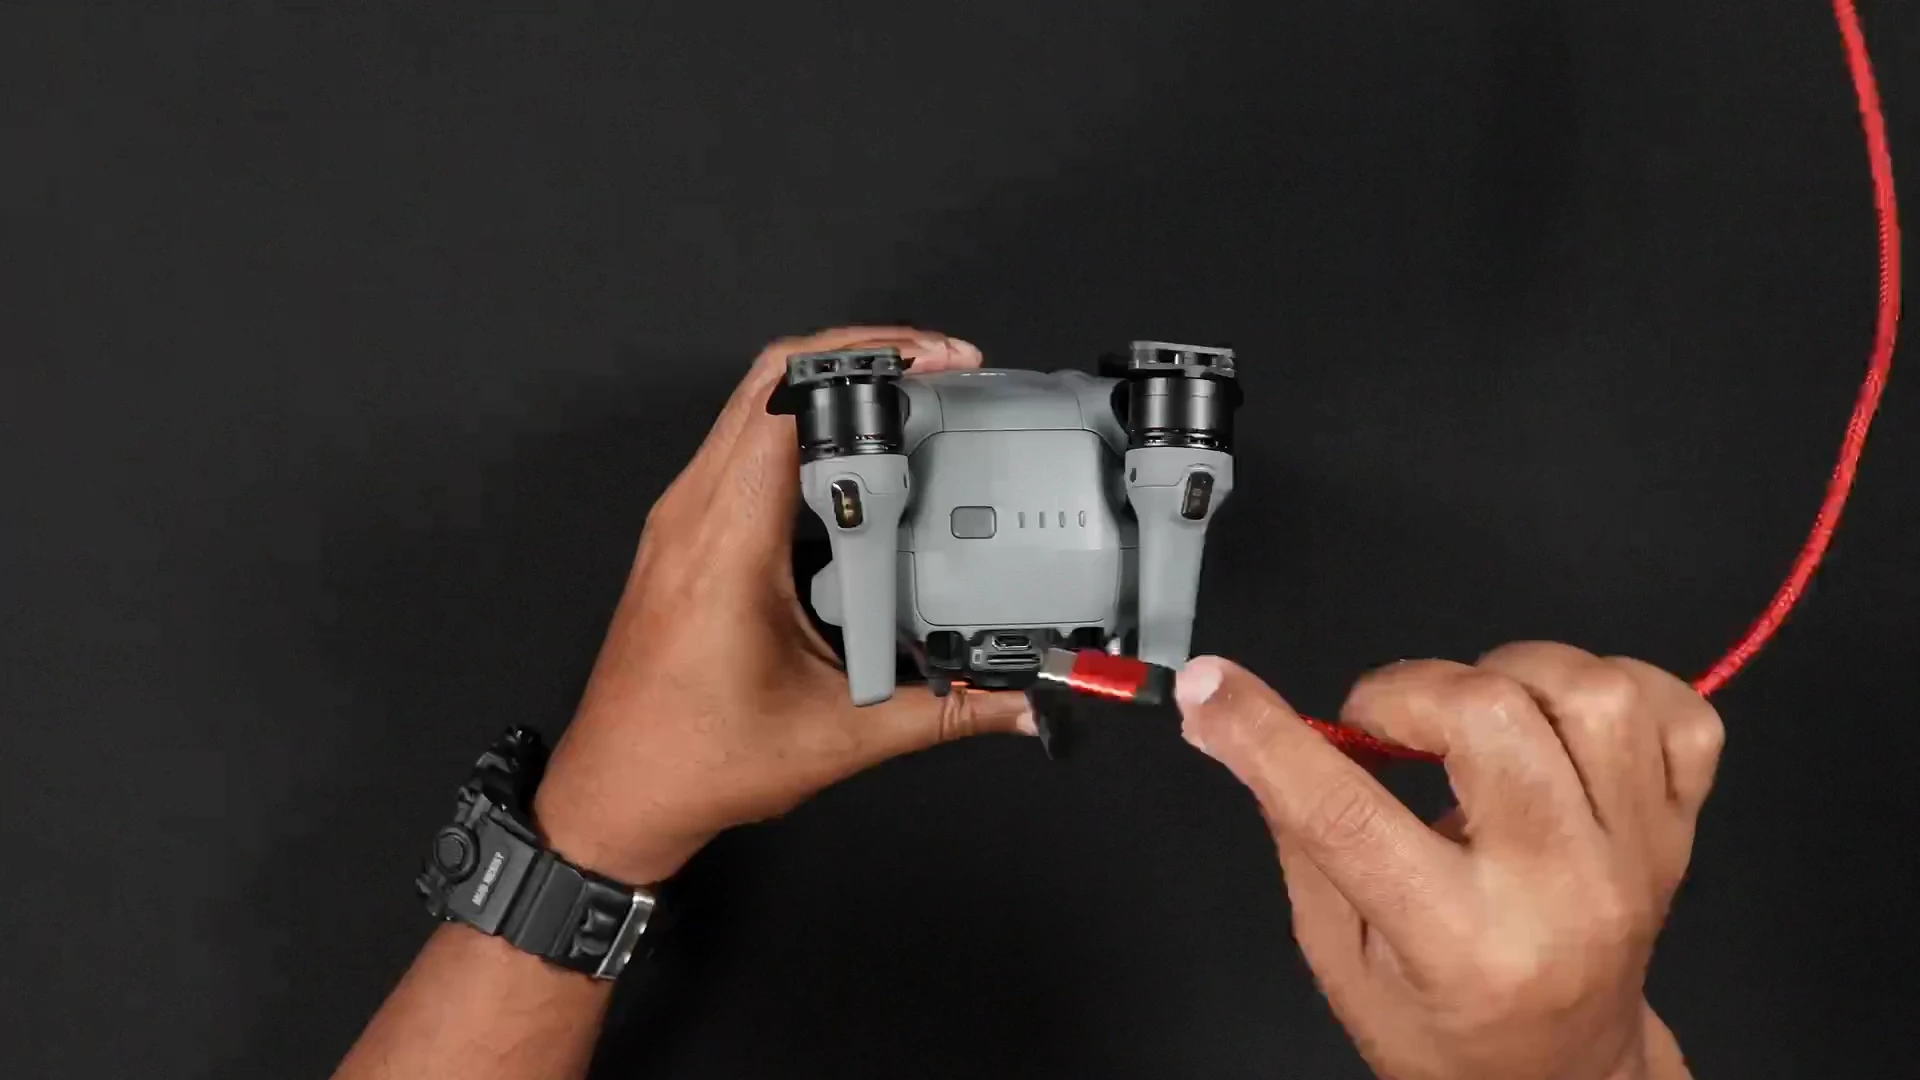
The first Methodology: That is for many who bought the Air 3S with just one drone battery. The Air 3S battery might be charged whereas put in within the Air 3S.
Find the USB-C charging port within the rear of the drone. Insert the supplied UBS-C cable into the Air 3S after which right into a 65-watt charger. The battery will start charging.

The 2nd Methodology: In case you bought one of many Flymore combos, it is possible for you to to cost all 3 batteries, in succession, not concurrently.
To do that, insert the batteries into the Flymore combos charging hub and join the included USB-C cable to both a 65-watt or 100-watt PD charger (not included). The batteries will then cost individually, one after one other.
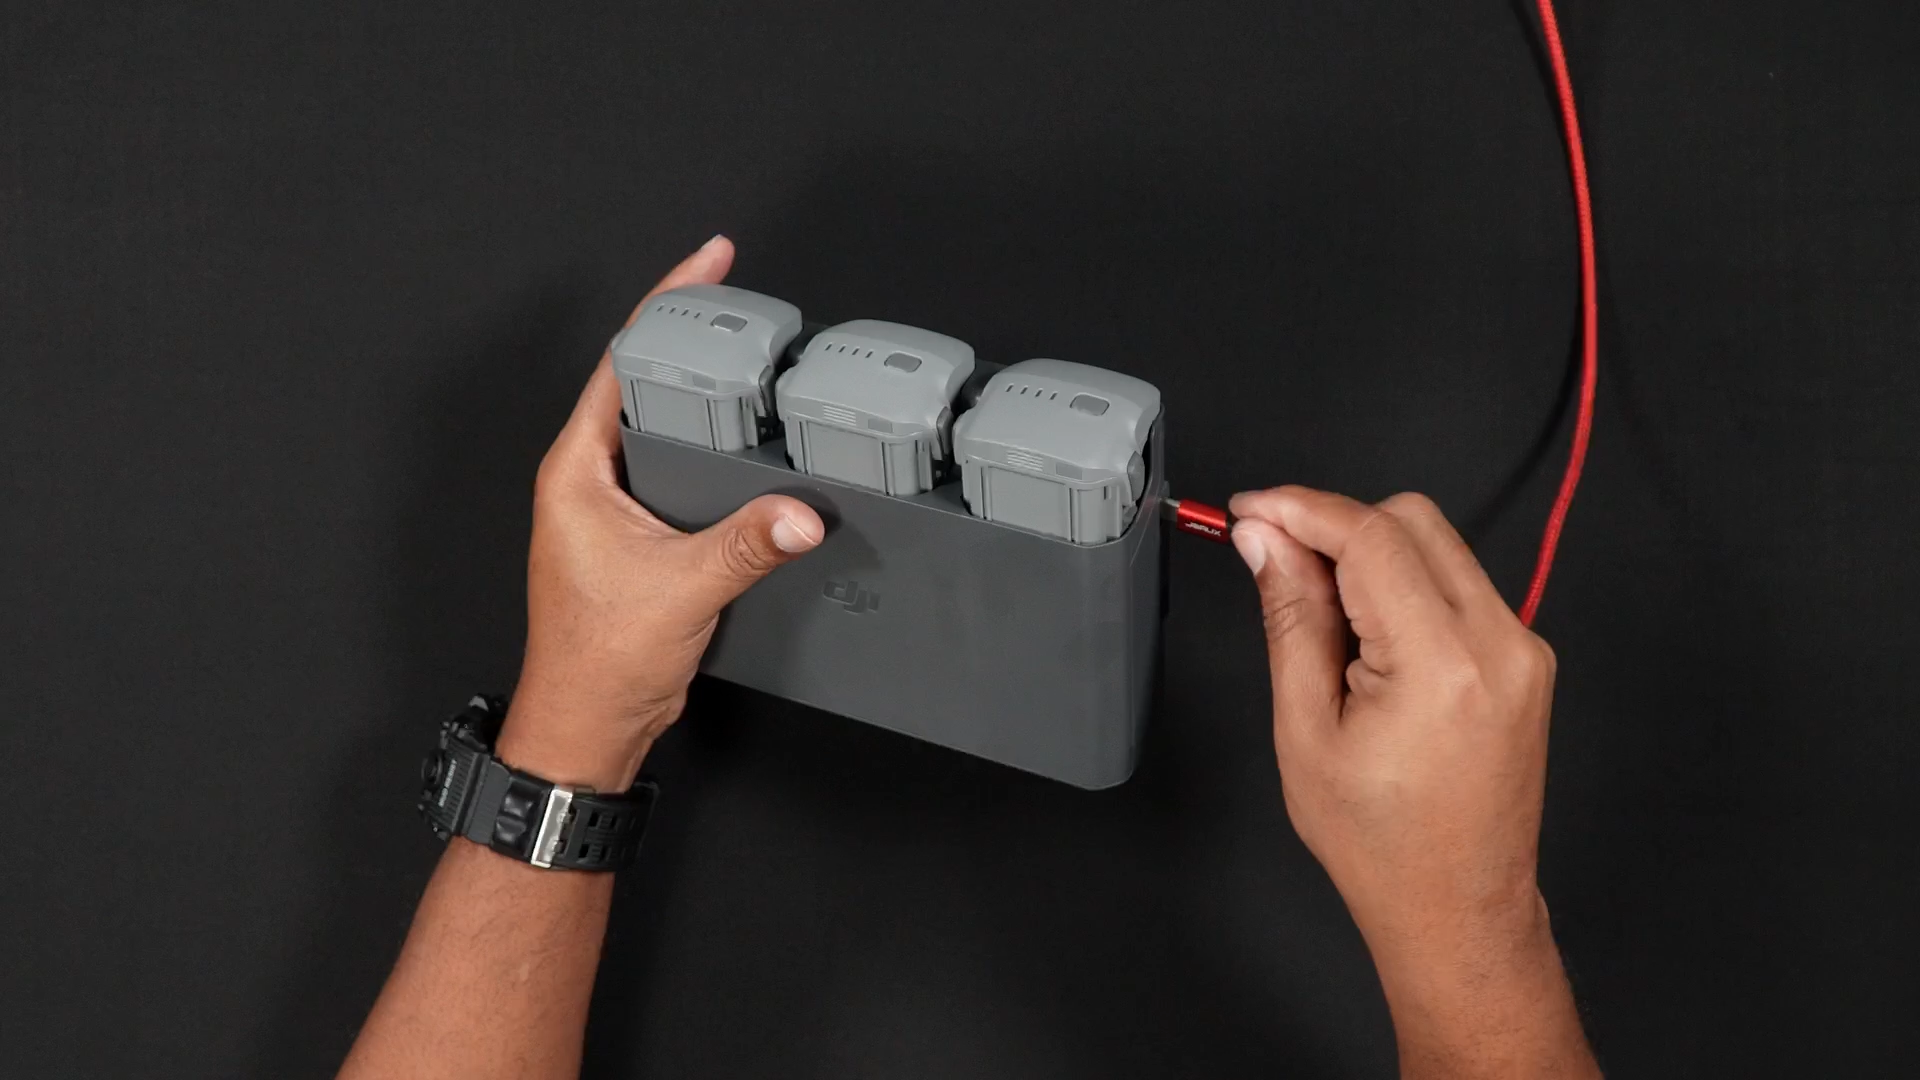
You probably have a fly extra combo and in addition bought an extra battery, then you may cost 3 batteries within the charging hub and use a separate USB-C cable in a 100-watt PD charger to cost the extra battery within the Air 3S itself.
SD Playing cards
Whereas the Air 3S does have 42GB of inside storage, you’ll need to buy an SD card if you happen to’d wish to file numerous movies or pictures.
In case you bought the DJI RC 2 equipment, there may be additionally an SD card slot within the distant controller. The SD card for the DJI RC2 is used for display screen recording. In case you don’t do display screen recording, you can retailer an SD Card within the DJI RC 2 as a backup, simply in case the Air 3S’s SD card is left in a pc at residence.
To insert SD playing cards into the Air 3S:
STEP 1: Be sure that the Air 3S is powered off.
Whereas holding the Air 3S in a single hand, open the USB-C and SD card port.
Fastidiously insert the SD card into the Air 3S’s SD card slot, with the gold pin set pointed up (in direction of you). Don’t push the cardboard in all the way in which simply but, as it could possibly eject and fly away from you.
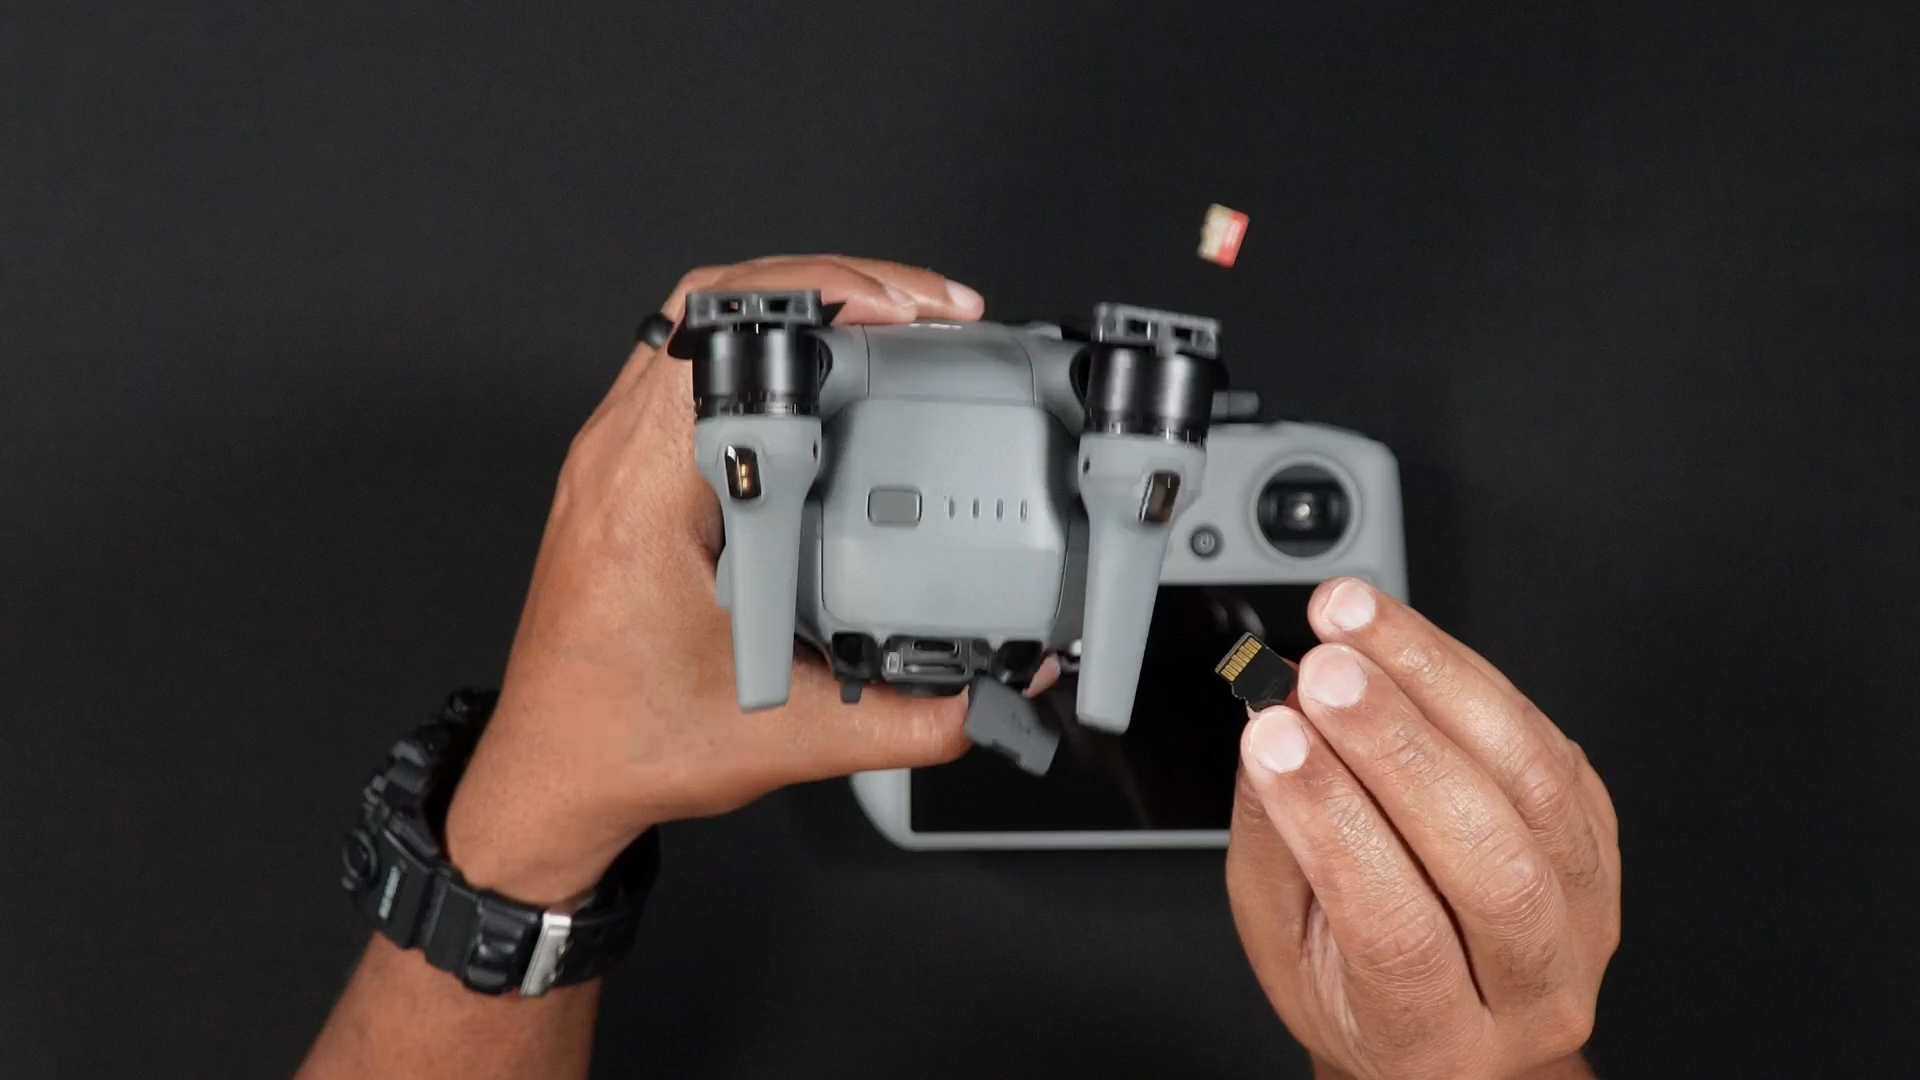
STEP 2: Whereas the SD card is within the slot, utilizing your fingernail at a slight angle, push the SD card in till it makes an audible “click on”.
As a result of the SD card slot is spring loaded, if you happen to don’t press the SD card in with a nail at a slight angle, your finger might slip, inflicting the cardboard to drive eject and be misplaced.
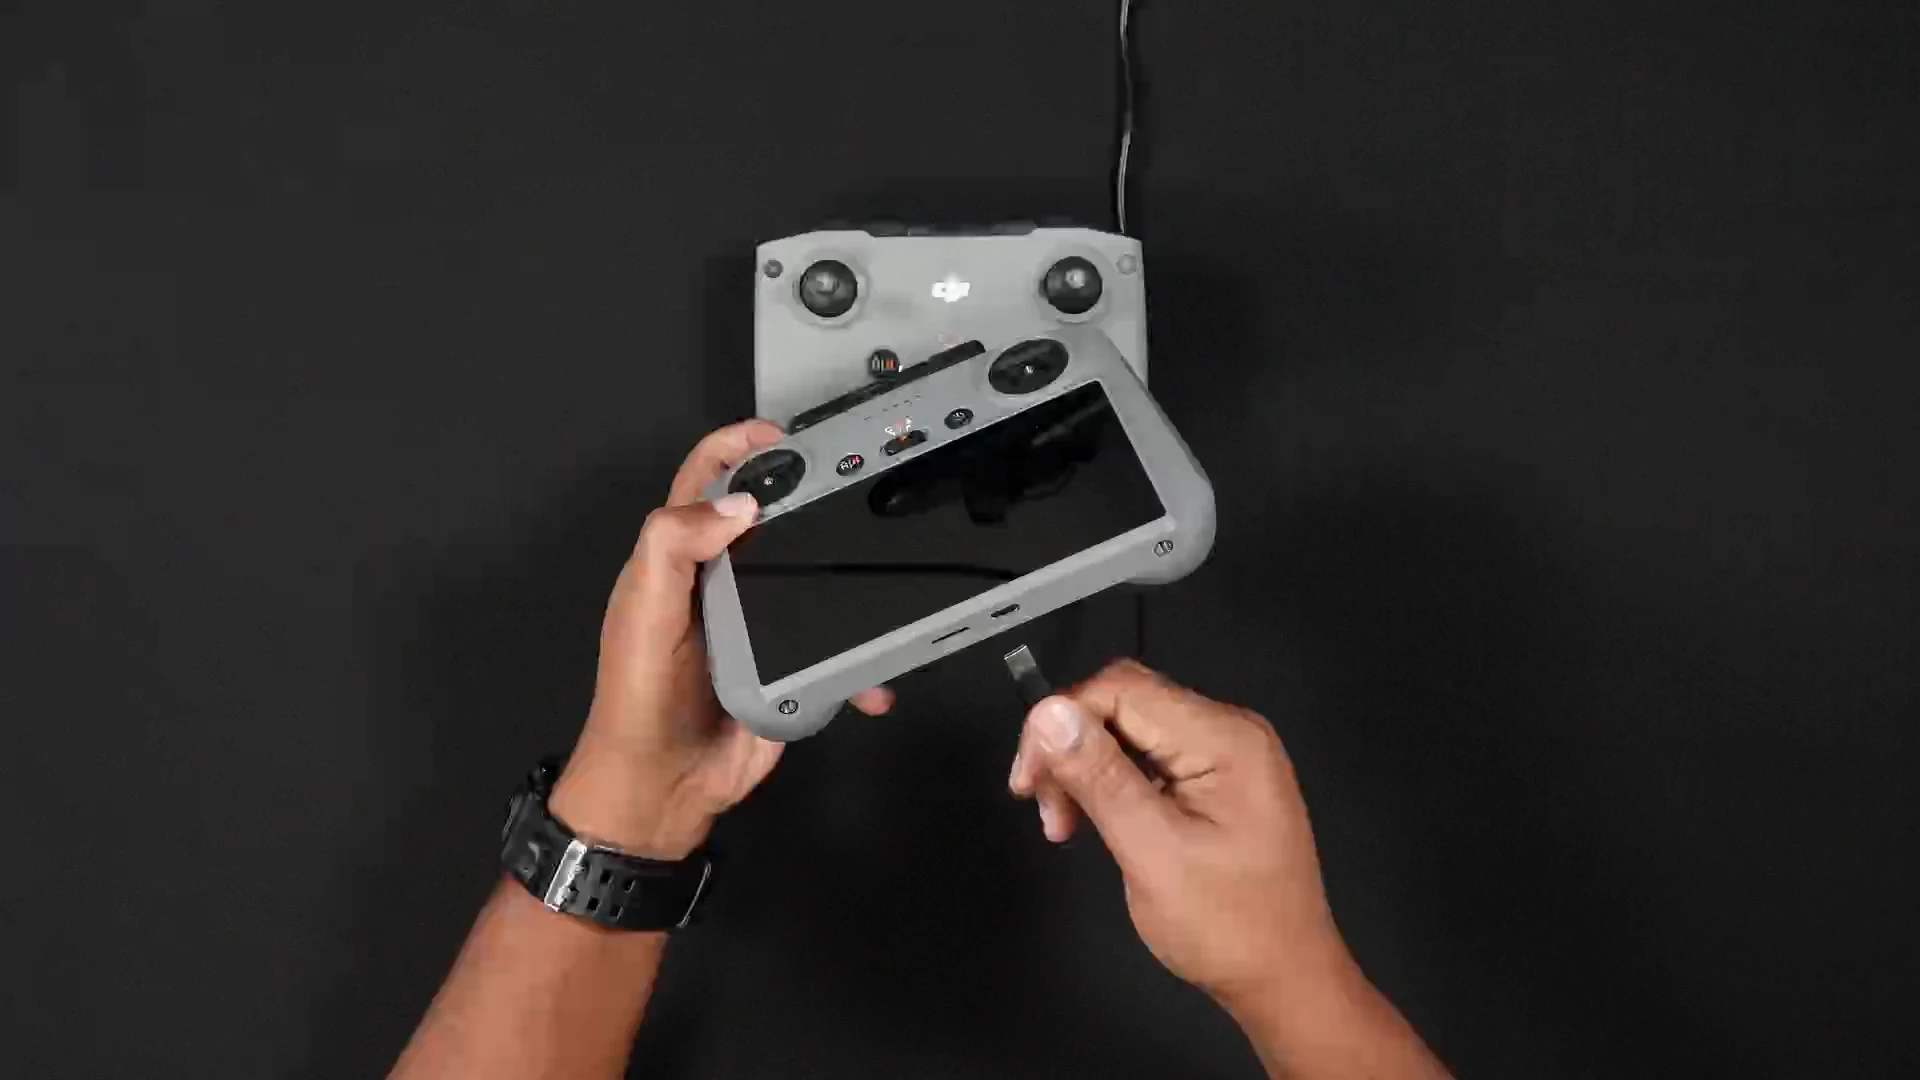
Inserting the Micro-SD Card (DJI RC 2)
To insert an SD card into the DJI RC 2:
STEP 1: With the DJI RC 2 powered off, partially insert the SD card into the DJI RC 2 SD card slot, this time with the gold pin set pointed down or away from you.

STEP 2: Push the SD card in till it makes an audible “click on”.
Under is a listing, direct from DJI, of really useful SD playing cards:
- SanDisk Excessive PRO 32GB V30 U3 A1 microSDHC
- Lexar 1066x 64GB V30 U3 A2 microSDXC
- Lexar 1066x 128GB V30 U3 A2 microSDXC
- Lexar 1066x 256GB V30 U3 A2 microSDXC
- Lexar 1066x 512GB V30 U3 A2 microSDXC
- Kingston Canvas GO! Plus 64GB V30 U3 A2 microSDXC
- Kingston Canvas GO! Plus 128GB V30 U3 A2 microSDXC
- Kingston Canvas React Plus 64GB V90 U3 A1 microSDXC
- Kingston Canvas React Plus 128GB V90 U3 A1 microSDXC
- Kingston Canvas React Plus 256GB V90 U3 A1 microSDXC
- Samsung EVO Plus 512GB V30 U3 A2 microSDXC
» MORE: Methods to Format SD Playing cards in DJI Drones (Fast Steps with Images)
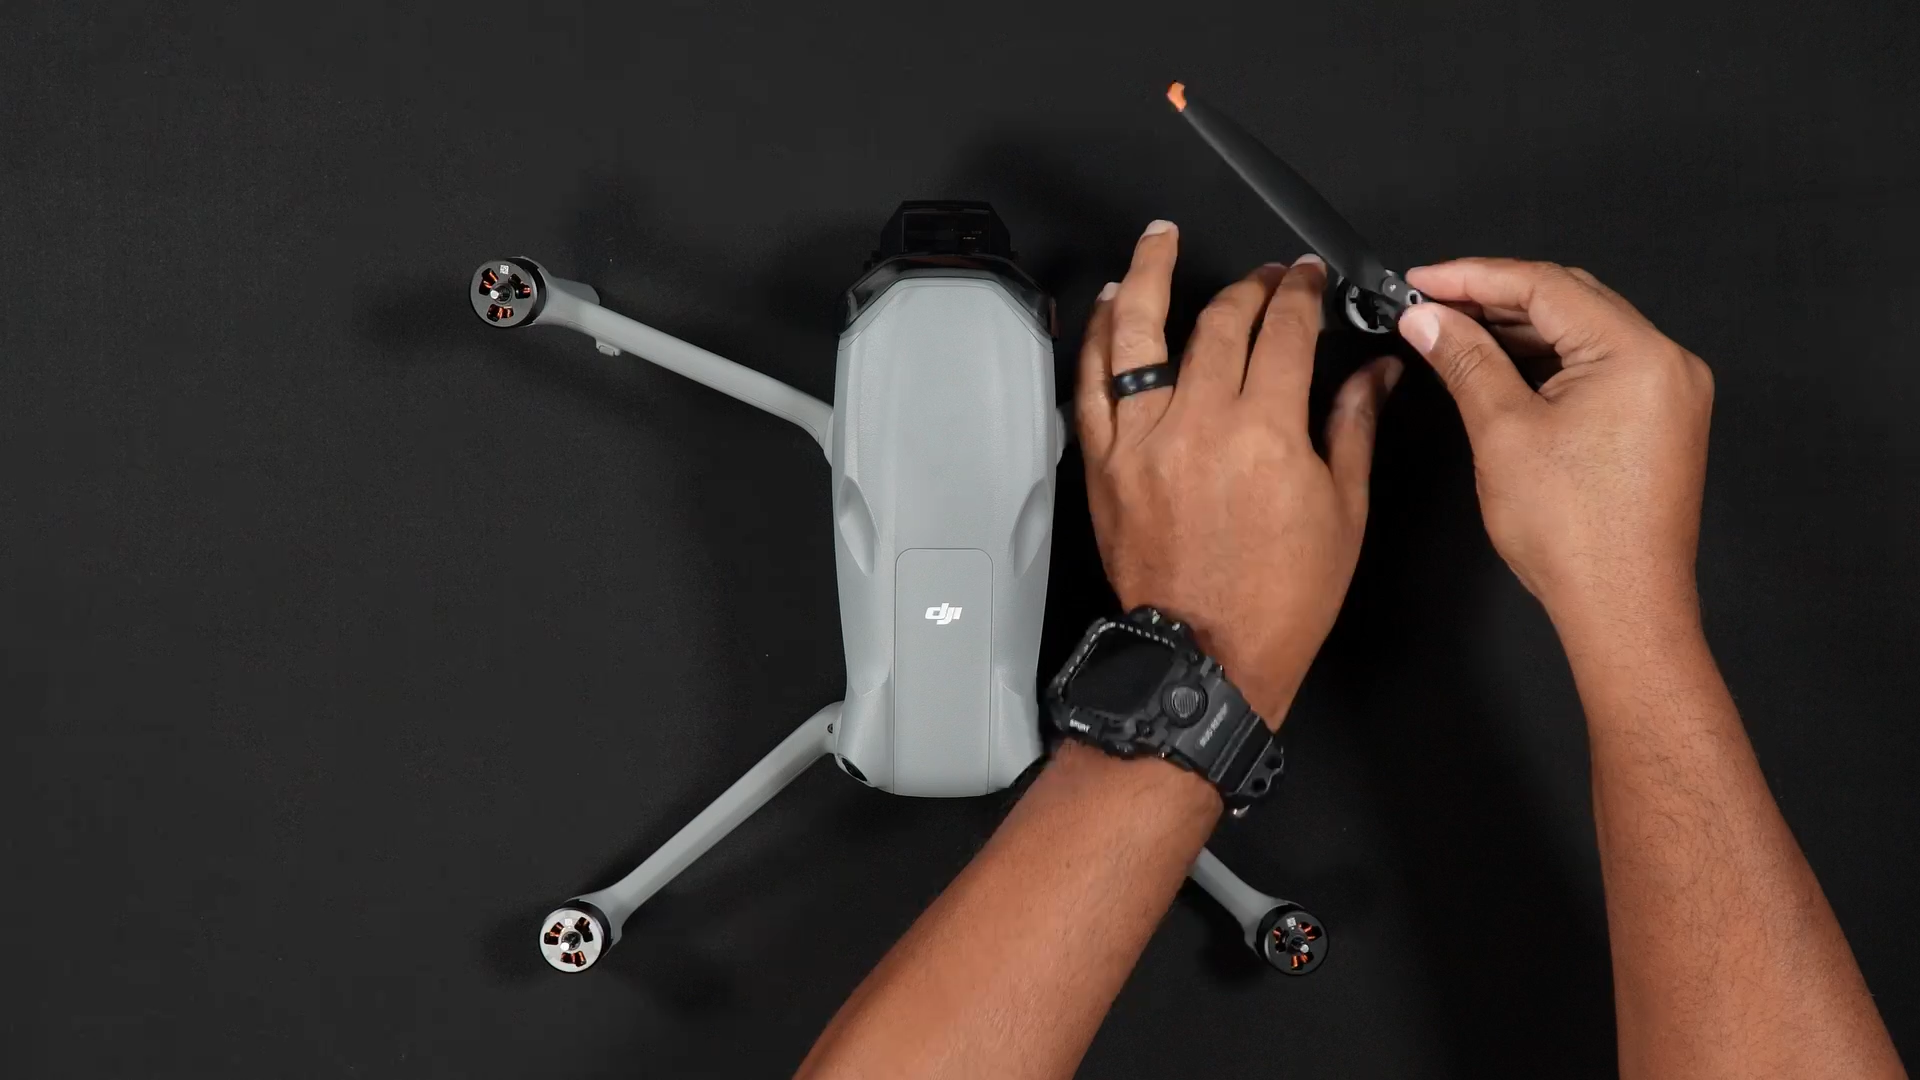
The Propellers
In case you bought the Air 3S Flymore Combo, the propellers are usually not put in on the Air 3S however are as an alternative situated packed within the carrying bag.
As is the case with all DJI drones, the propellers should be put in on the proper motors for the Air 3S to fly correctly.
Two totally different units of props should be put in on the Air 3S. The propellers have both black or grey markings, which match the corresponding motor with the identical colour.
- the entrance/left motor is coloured BLACK
- the entrance/proper motor is GRAY
- the rear/proper leg is BLACK
- the rear/left leg is GRAY
With the appropriately coloured propeller for every arm and leg, push and twist the propeller onto the motor. You’ll really feel when the propeller is seated on the motor appropriately.
» MORE: Drone Propellers (Newbie’s Information)
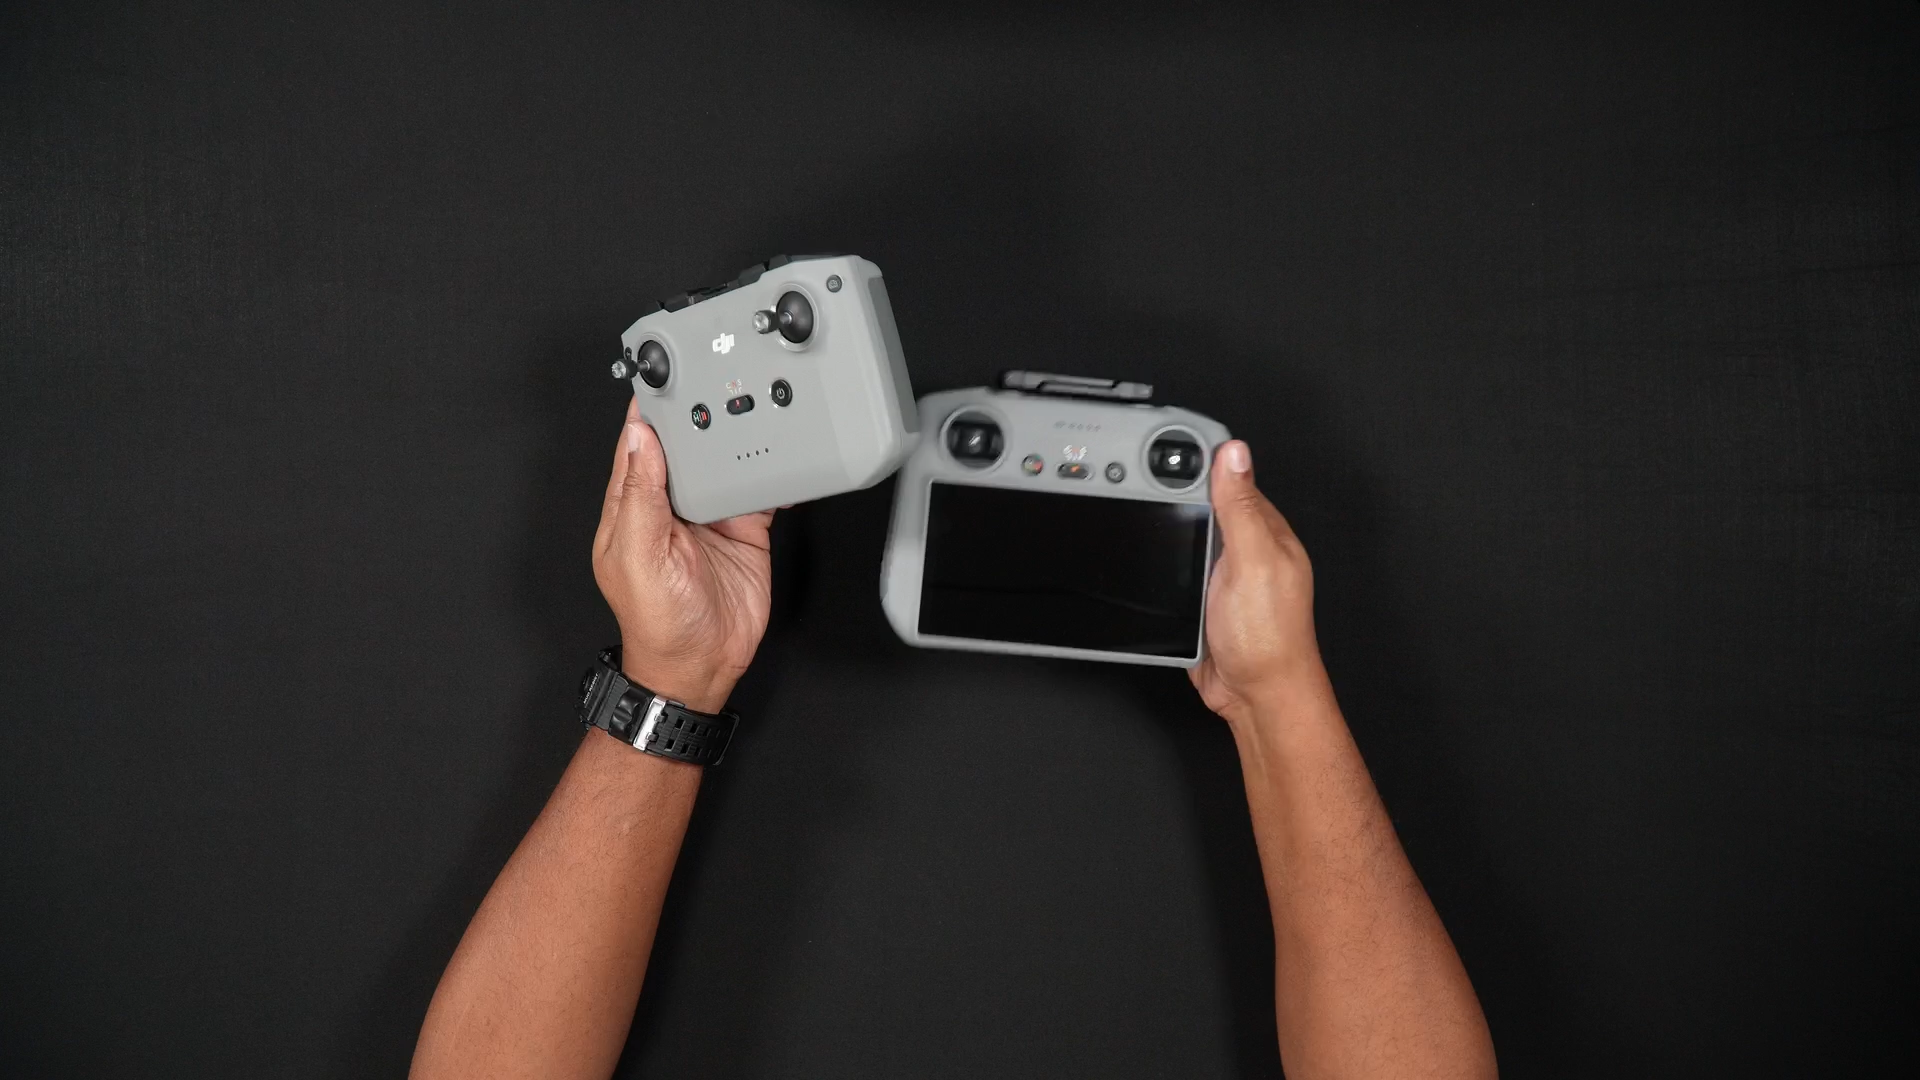
Management Sticks
Whether or not you bought the RC-2 or RC-N3 combo, the management sticks are usually not pre-installed. You’ll discover the 2 management sticks on the again of both distant controller, within the two management stick storage slots.
To put in the Management sticks:
STEP 1: Take away the Management sticks from the management stick storage slots on the again of the distant controller.
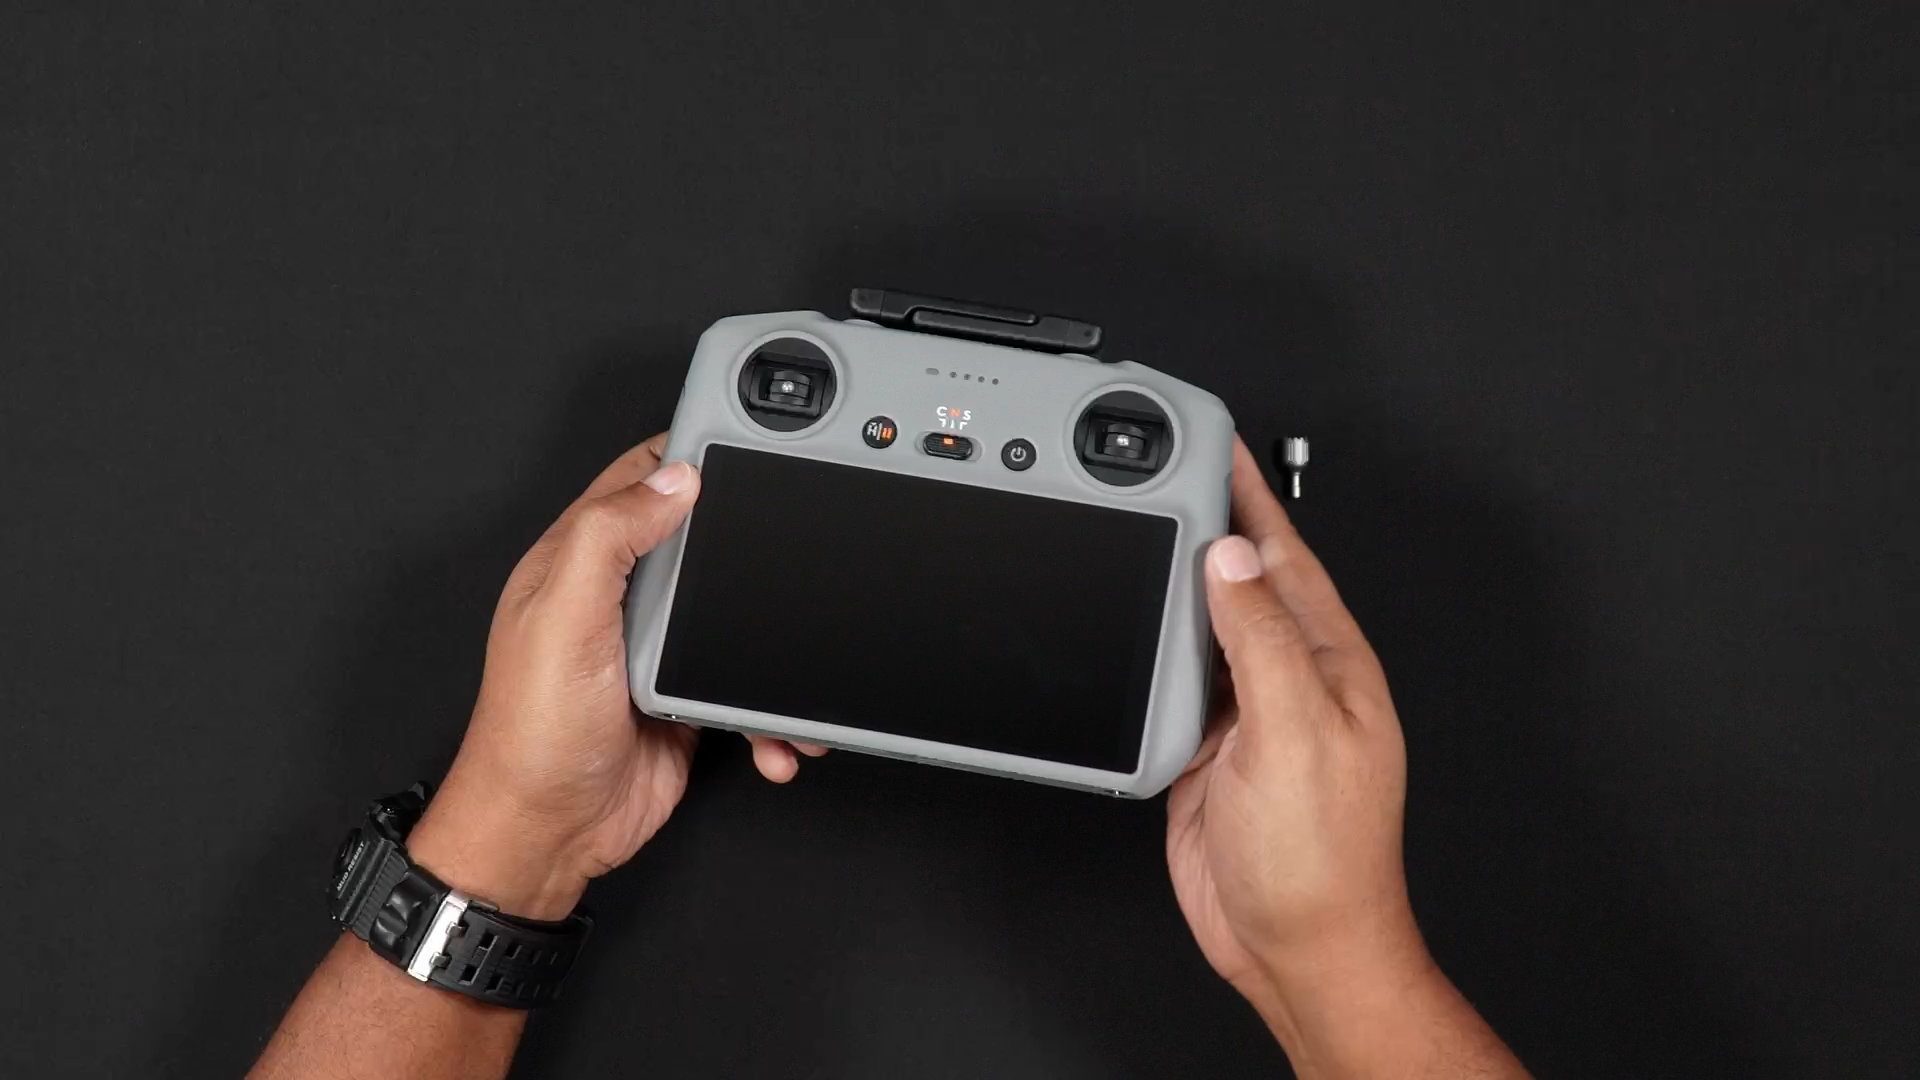
STEP 2: Find the holes on the entrance of the distant controller and mount the management sticks on the entrance of the RC.
Putting in the Flight Software program – DJI Fly
To fly your Air 3S, you’ll need to make use of DJI’s flight software program.
Flight software program is an app utilized by both a smartphone or digital gadget and related to your distant controller, which permits the Air 3S and distant controller to speak, important for flight management.
The software program that works for the Air 3S is the DJI Fly app. You probably have a DJI RC 2 combo, the DJI Fly app is pre-loaded on the distant controller.
If you’re utilizing a separate digital gadget with the RC-N3 controller, you’ll must obtain the DJI Fly software program.
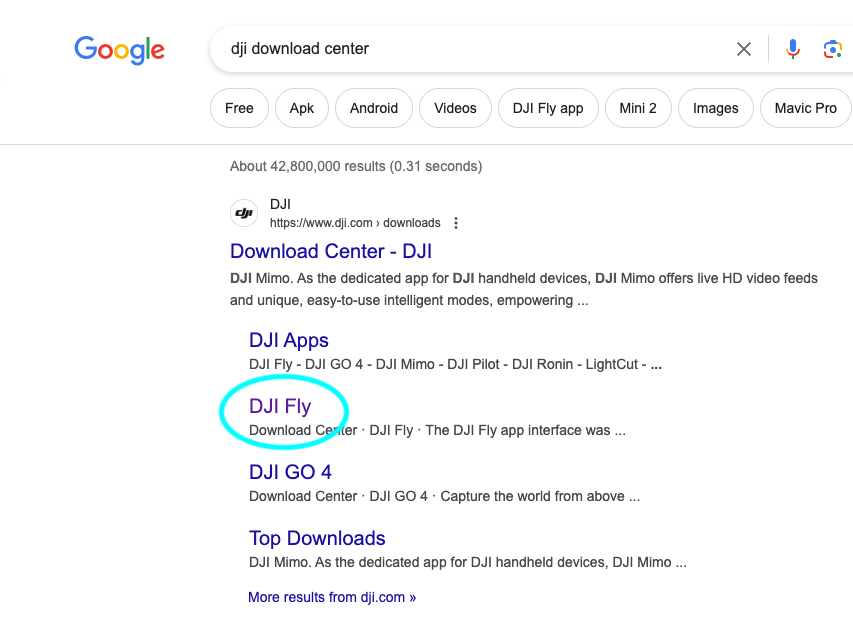
The place to Obtain DJI Fly
If you’re utilizing both an Android or iOS cellphone or pill, the hyperlinks to obtain the DJI Fly app are as follows:
Moreover, out of your smartphone or digital gadget, you are able to do a Google Seek for “DJI Obtain Middle”.
Within the outcomes, select DJI Fly and you’ll be delivered to the software program downloads web page.
Be aware: the DJI Fly app for Android is barely accessible on-line on the hyperlink above, and is now not accessible within the Google Play retailer, whereas the iOS model for Apple units is accessible through the App Retailer.
Organising or logging into your DJI Account
Now that you’ve got the DJI Fly app put in, it’s time to arrange your DJI Account. You may both accomplish that from throughout the app in your cellphone, or utilizing the DJI RC 2.
You probably have a DJI RC 2:
It’s suggested for the preliminary setup to hook up with DJI RC2 whereas close to your house WiFi. If you’re not ready to take action, you may connect with your cellphone’s hotspot.
STEP 1: Activate the RC by urgent as soon as on the facility button, then instantly press and maintain the facility button.
After the DJI splash display screen seems, you ought to be delivered to the “Welcome to DJI RC-2” display screen.
STEP 2: Scroll via the listing and select your language. After selecting your language hit NEXT.

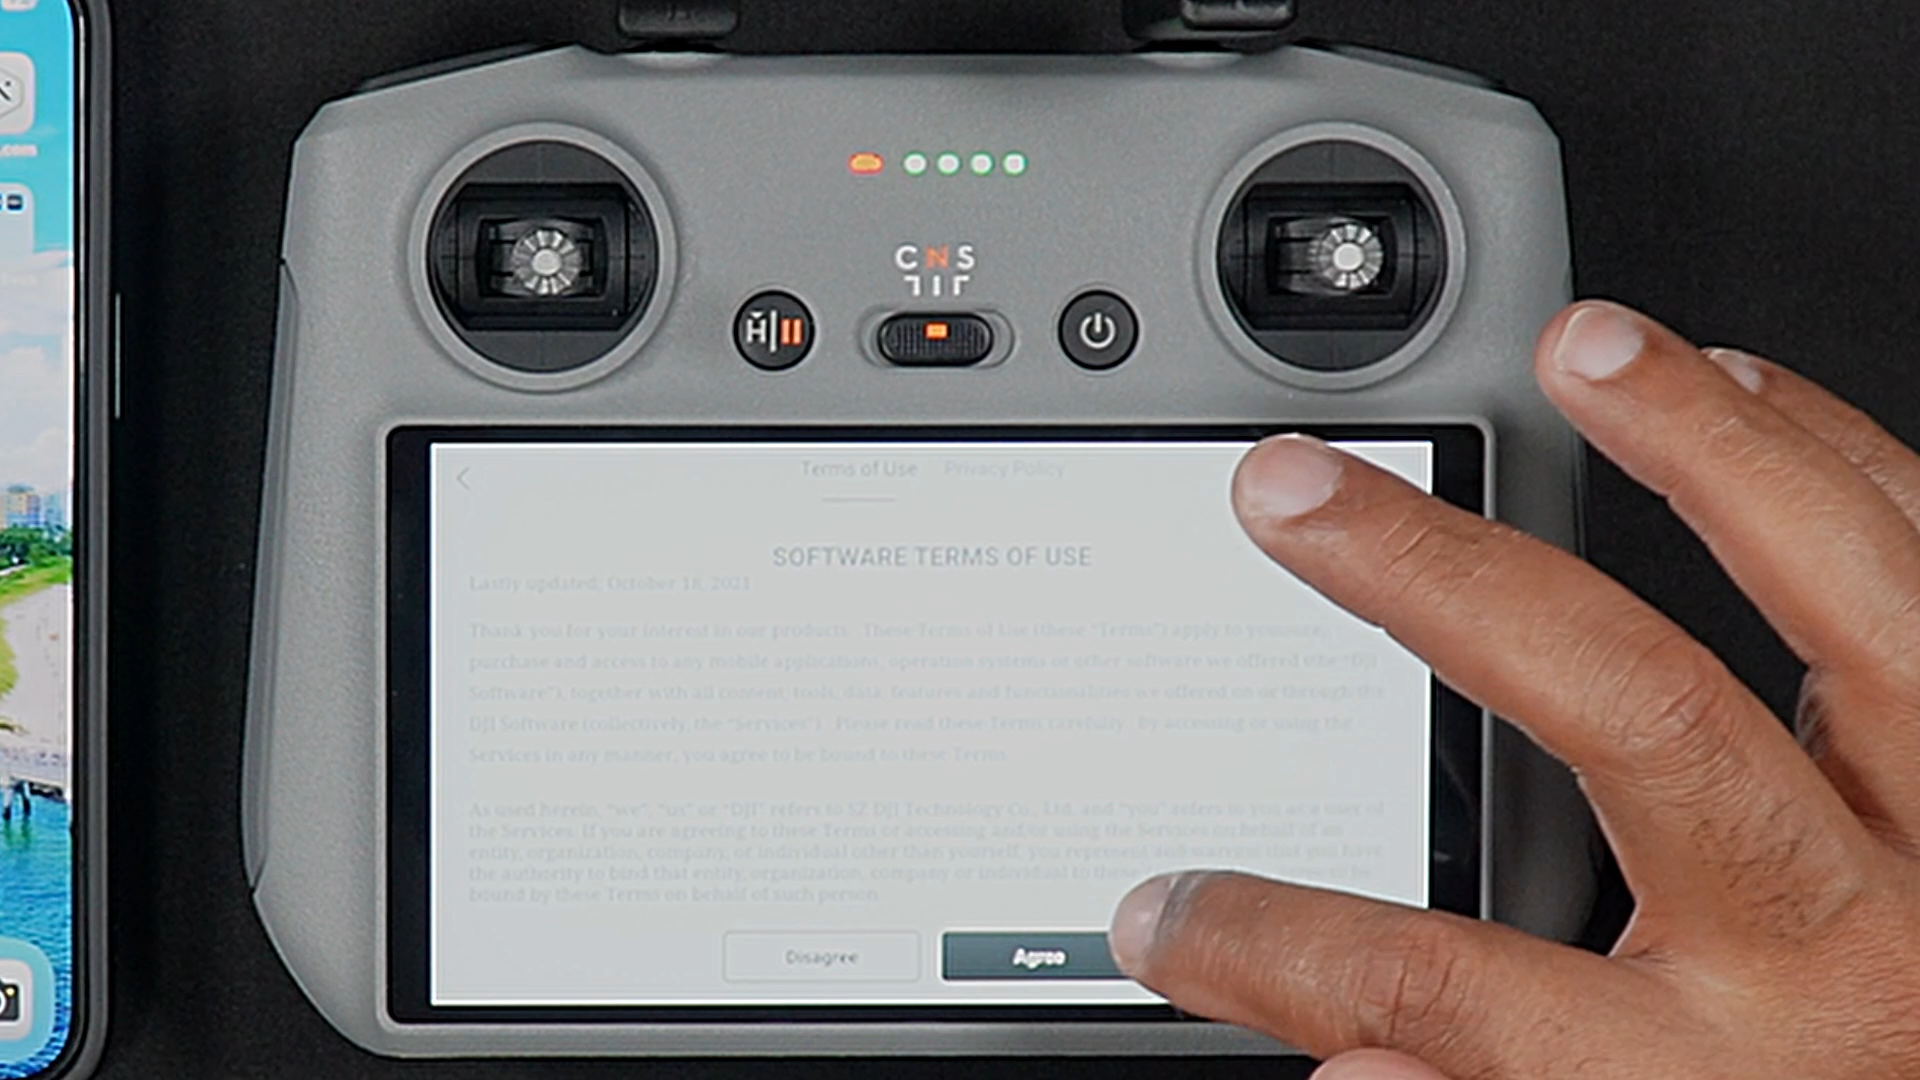
STEP 3: Settle for the phrases and circumstances and press AGREE.
STEP 4: Select your Nation/Area and press NEXT.

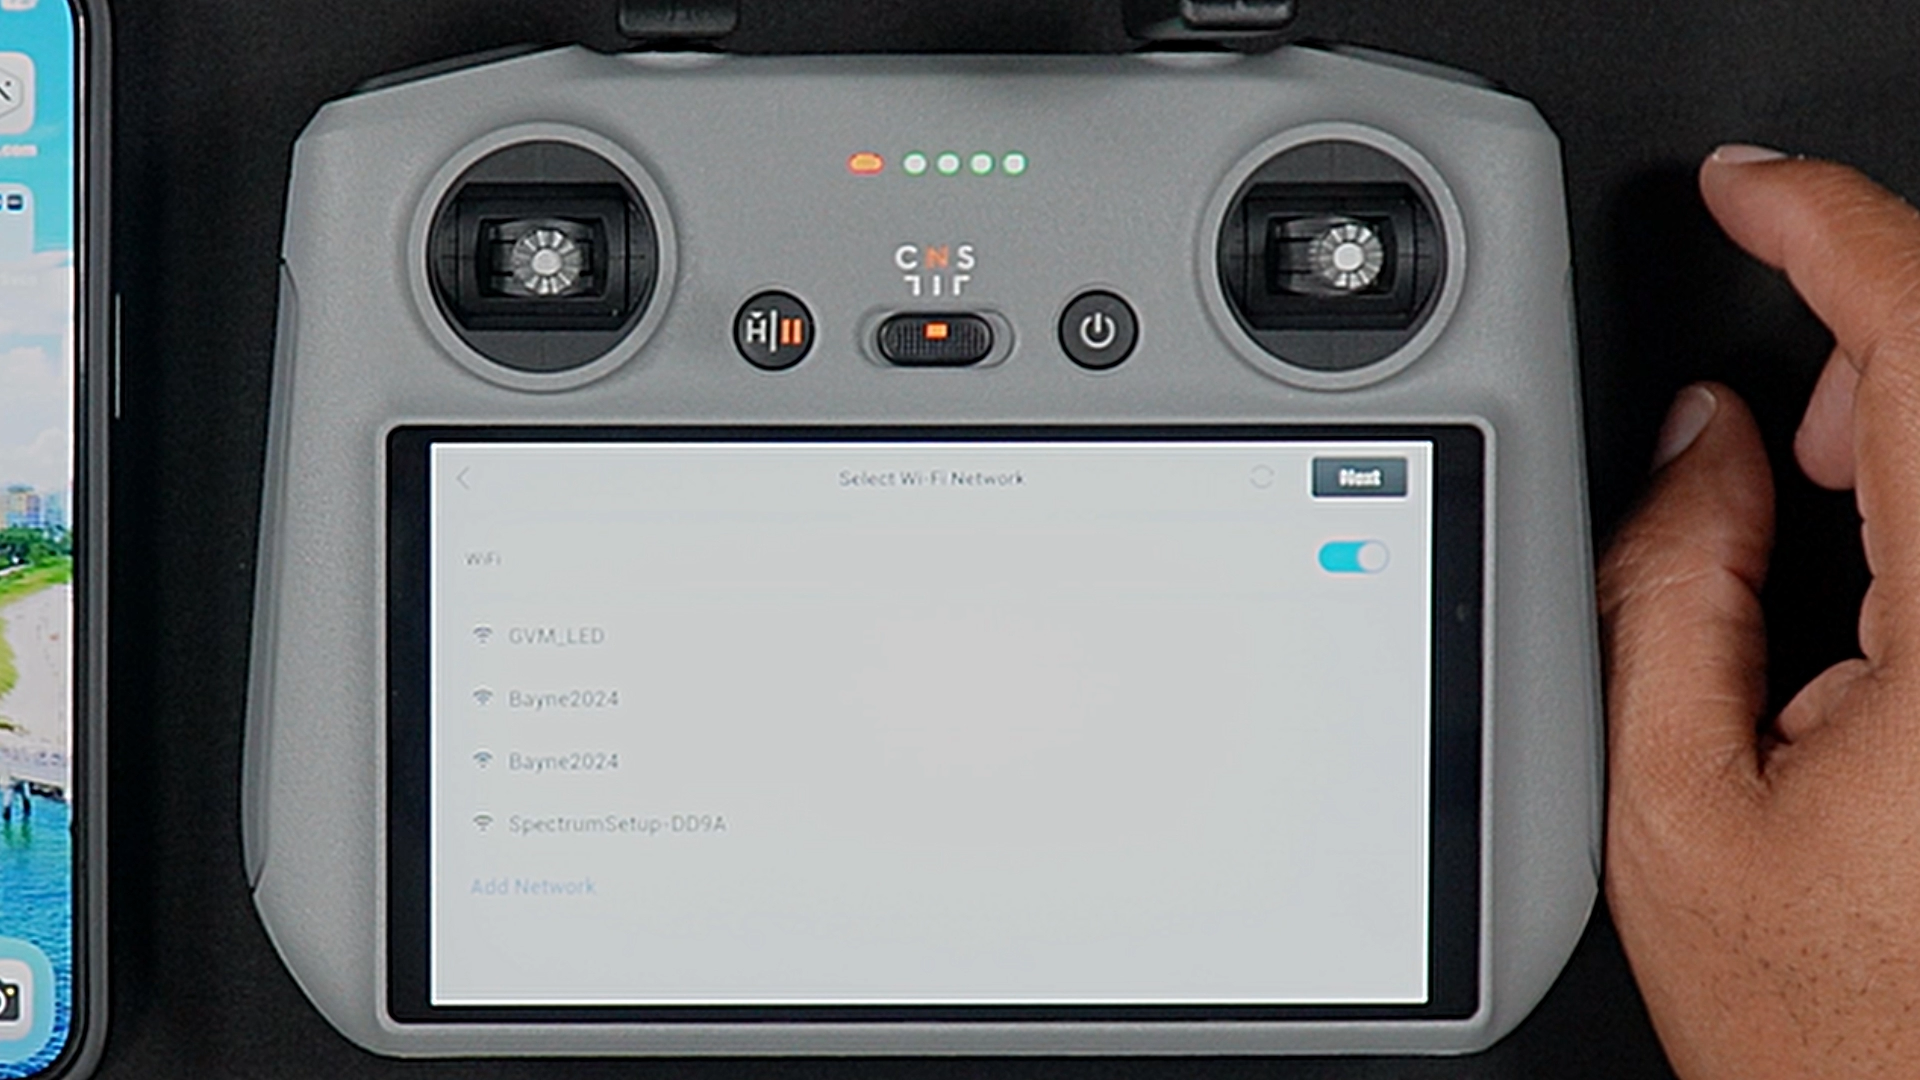
You’ll then be prompted to hook up with Wifi (or your hotspot)
Be aware: You’ll want to hook up with WiFi if organising a DJI account via the DJI RC 2.
STEP 1: Select your WiFi community from the listing of lively networks.
STEP 2: Enter your WiFi or hotspot password. After coming into the password press the blue checkmark then press OK on the high proper of the display screen.
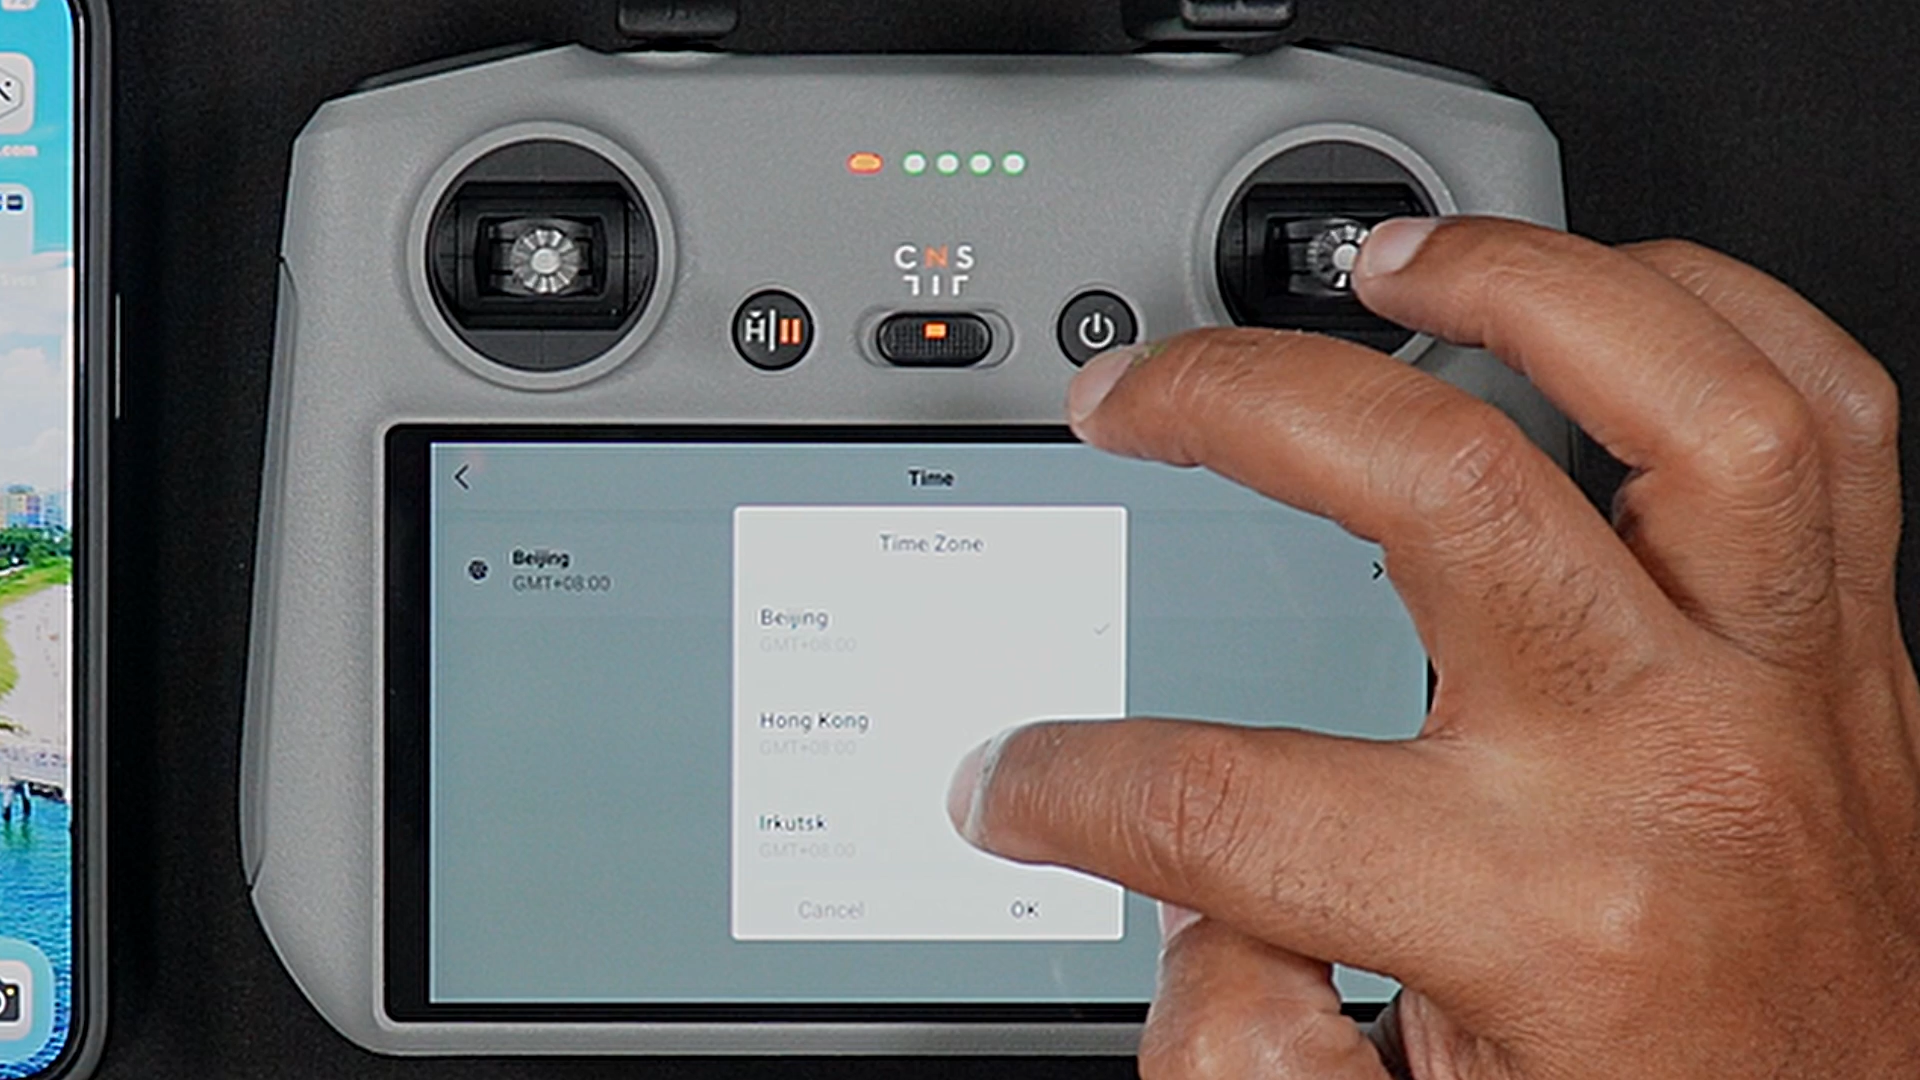
STEP 3: Choose your Time Zone by tapping the present timezone on the display screen (which may be Beijing). Then scroll via the listing till you discover your present timezone. Press NEXT.
STEP 4: Press affirm on the Be aware that pops up.
STEP 5: You probably have a DJI account you may log in right here or you may select “Create account”.
You probably have an RC-N3
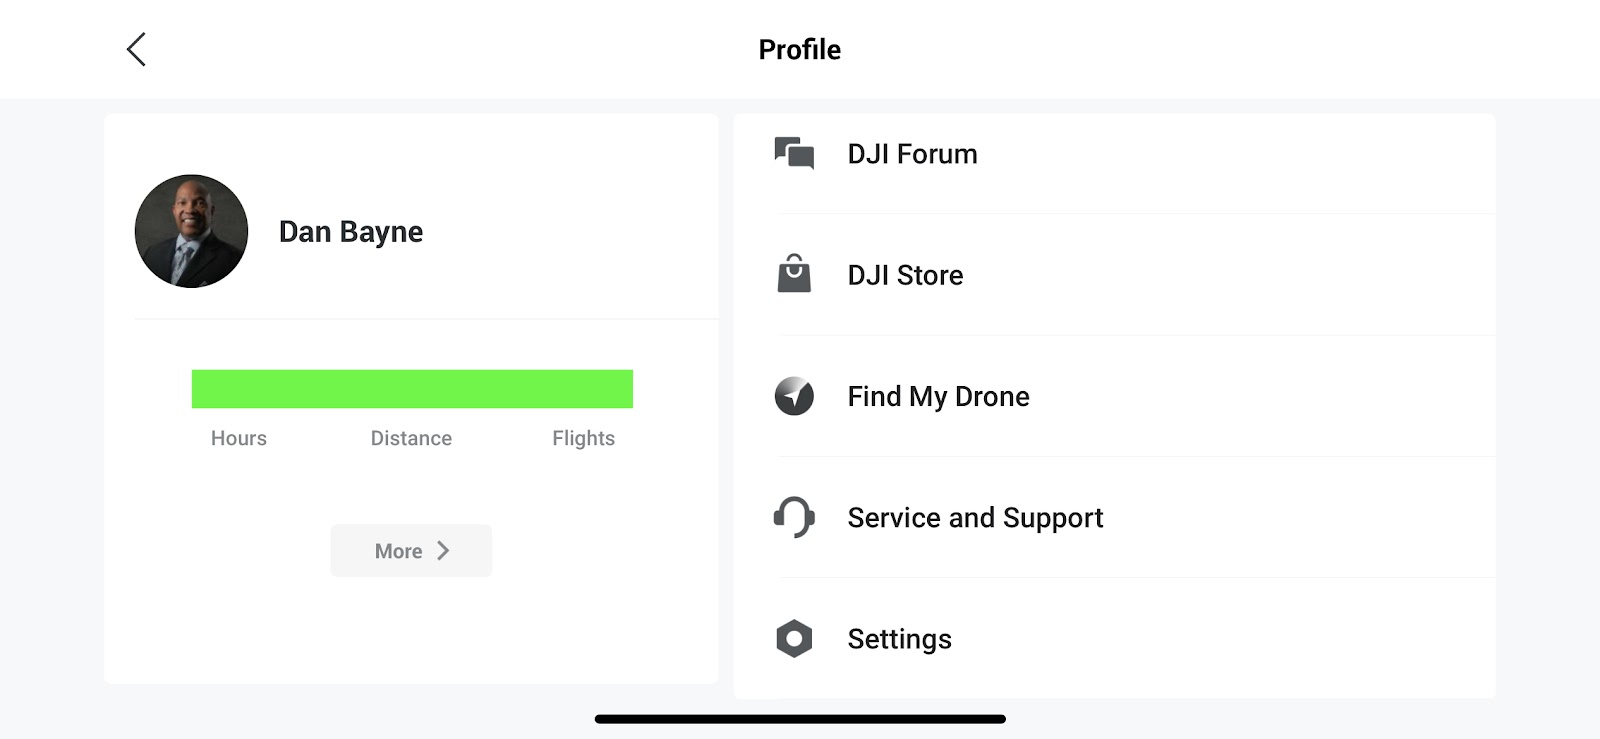
STEP 1: With out being related to the RC-N3, from a cellphone or sensible gadget launch the DJI Fly app and go into Profile.

STEP 2: As soon as within the Profile Display screen, go to Log In.
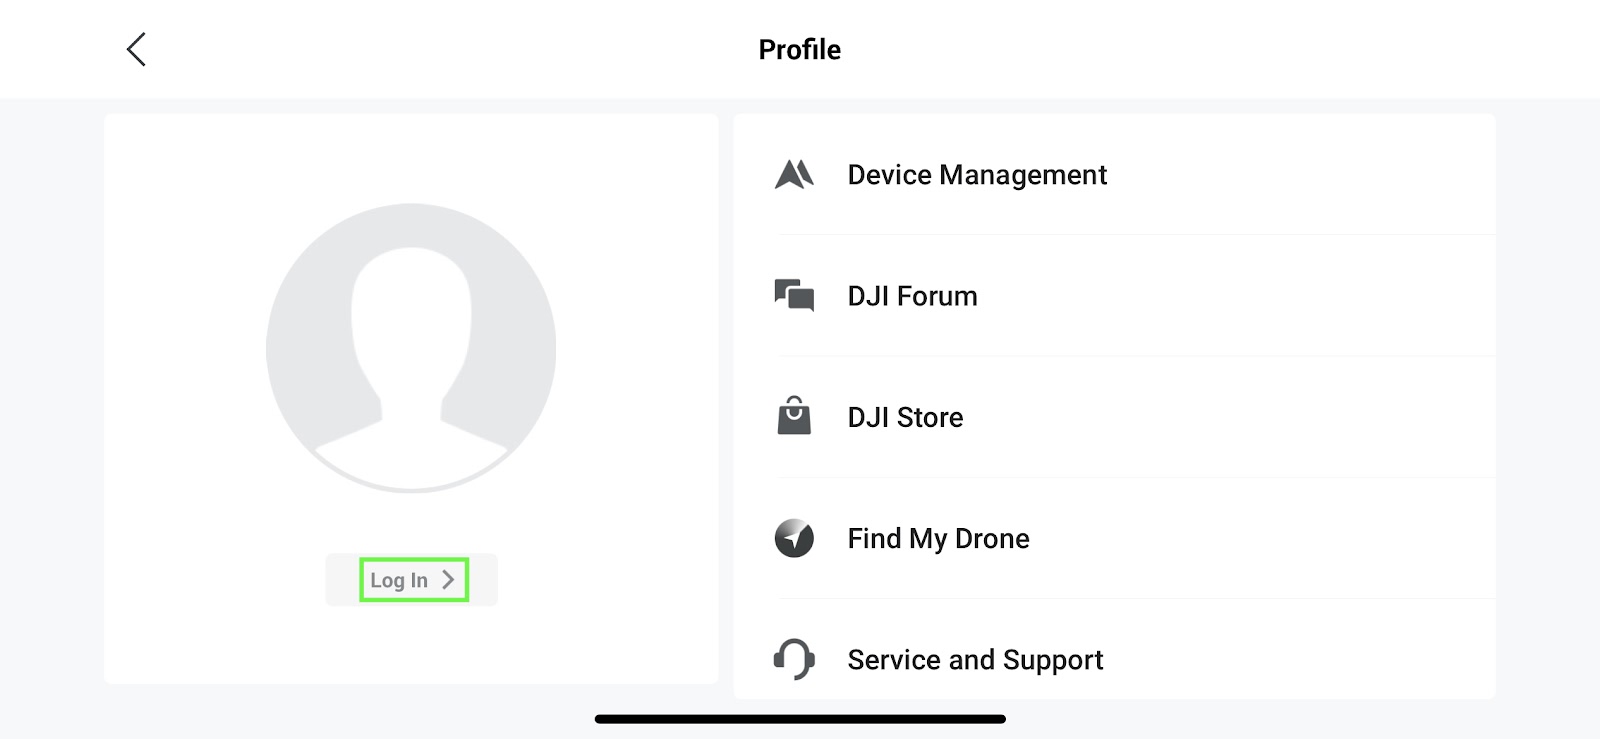
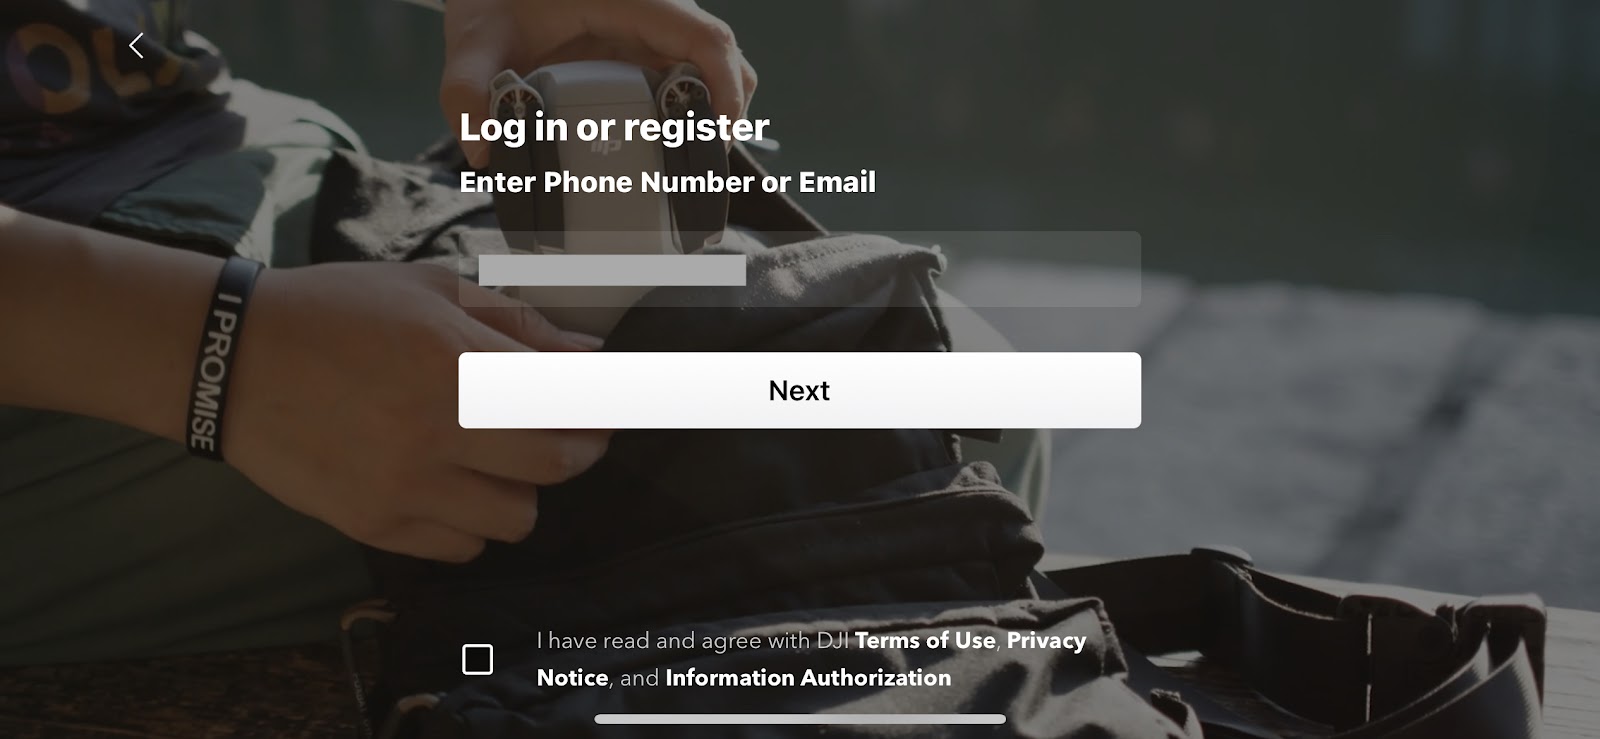
STEP 3: Enter the cellphone or e-mail you wish to register with and you’ll want to examine off the “I’ve learn” part on the backside.
If you have already got a DJI Login, enter that data right here.
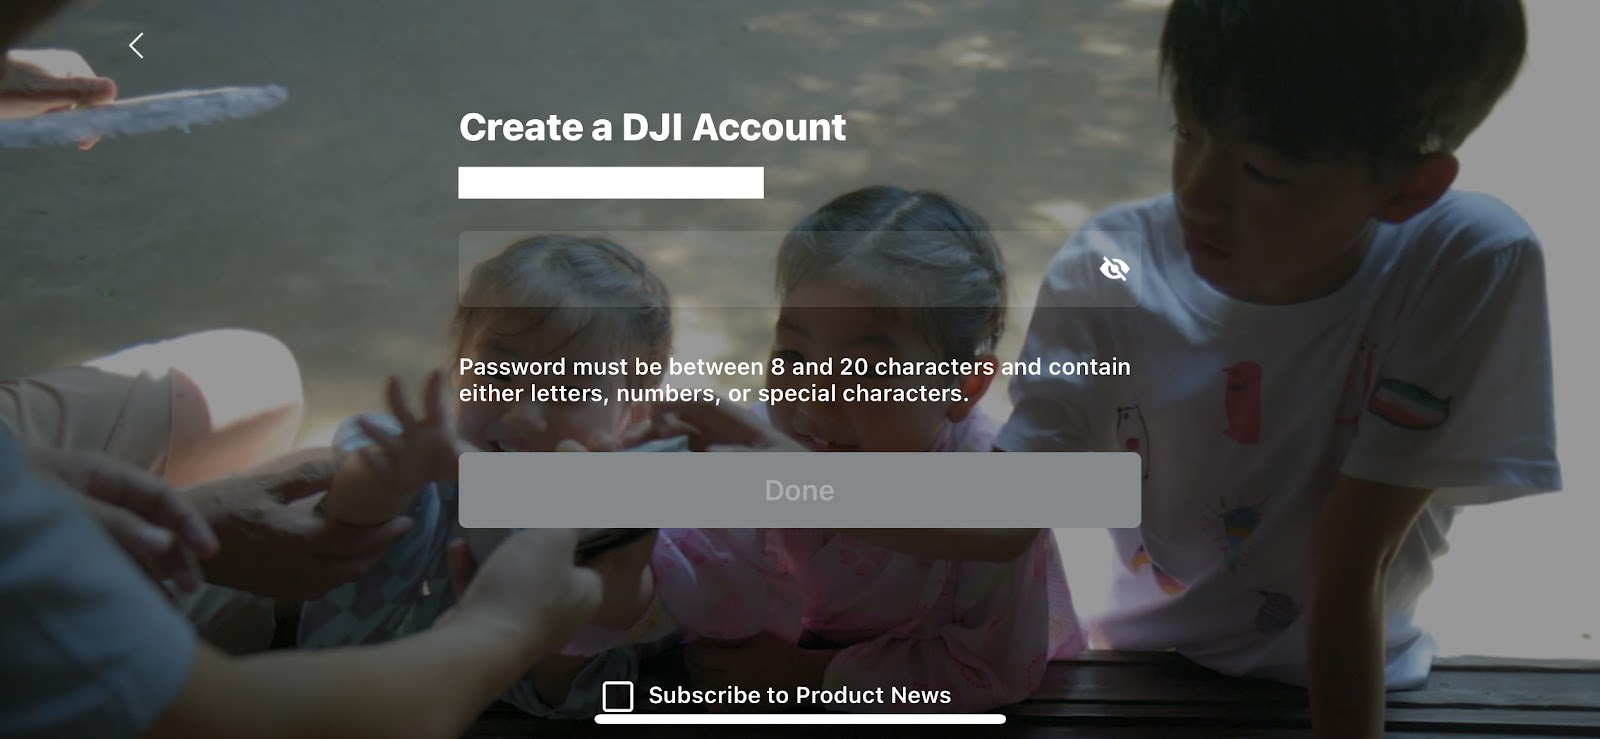
STEP 4: If you’re seeking to create your DJI Account, enter the password you wish to use.
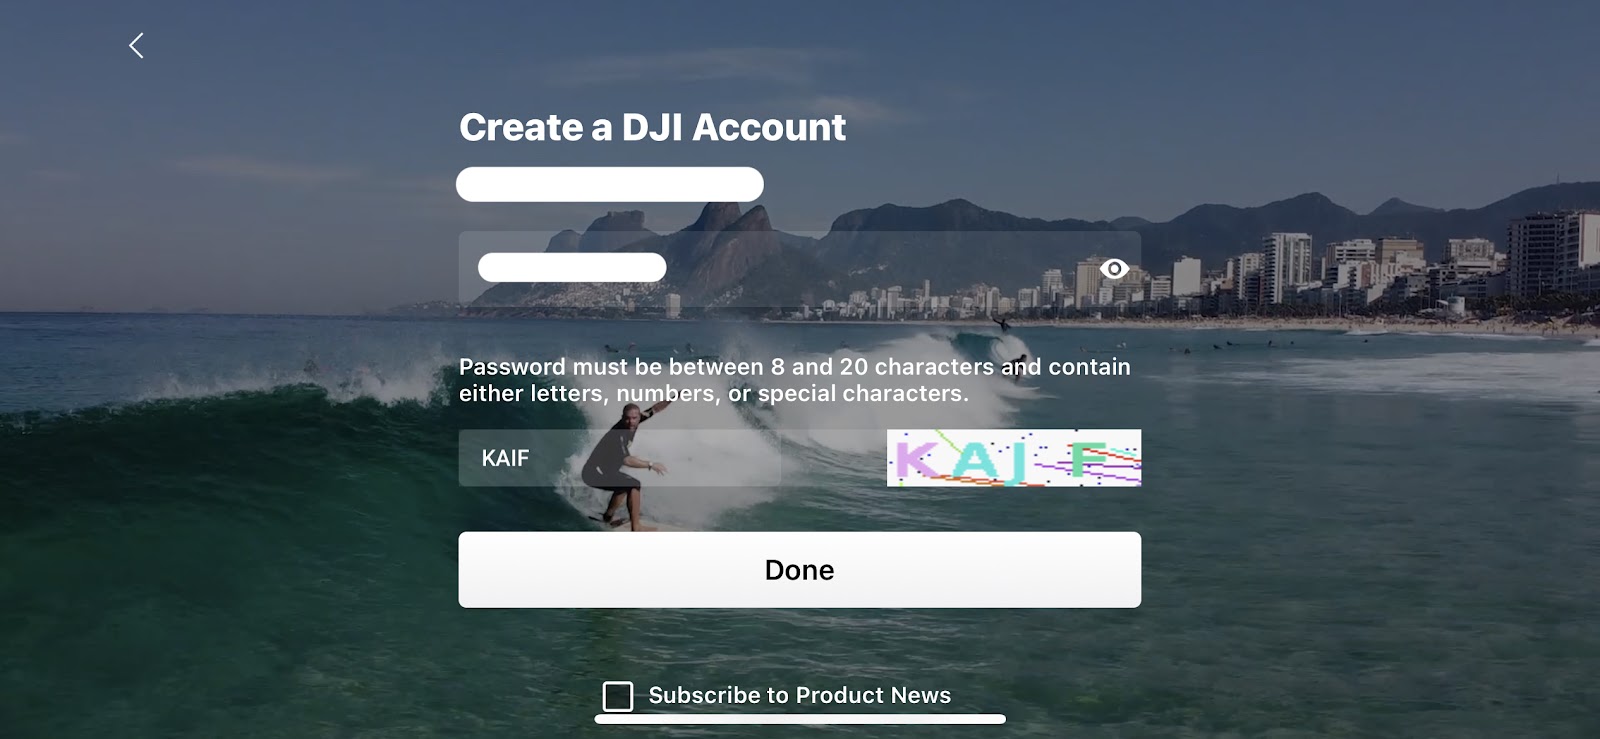
STEP 5: Enter the Captcha information and submit.
You’ll now be delivered to the primary profile web page. You will note you may have been arrange as a generic DJI Person.
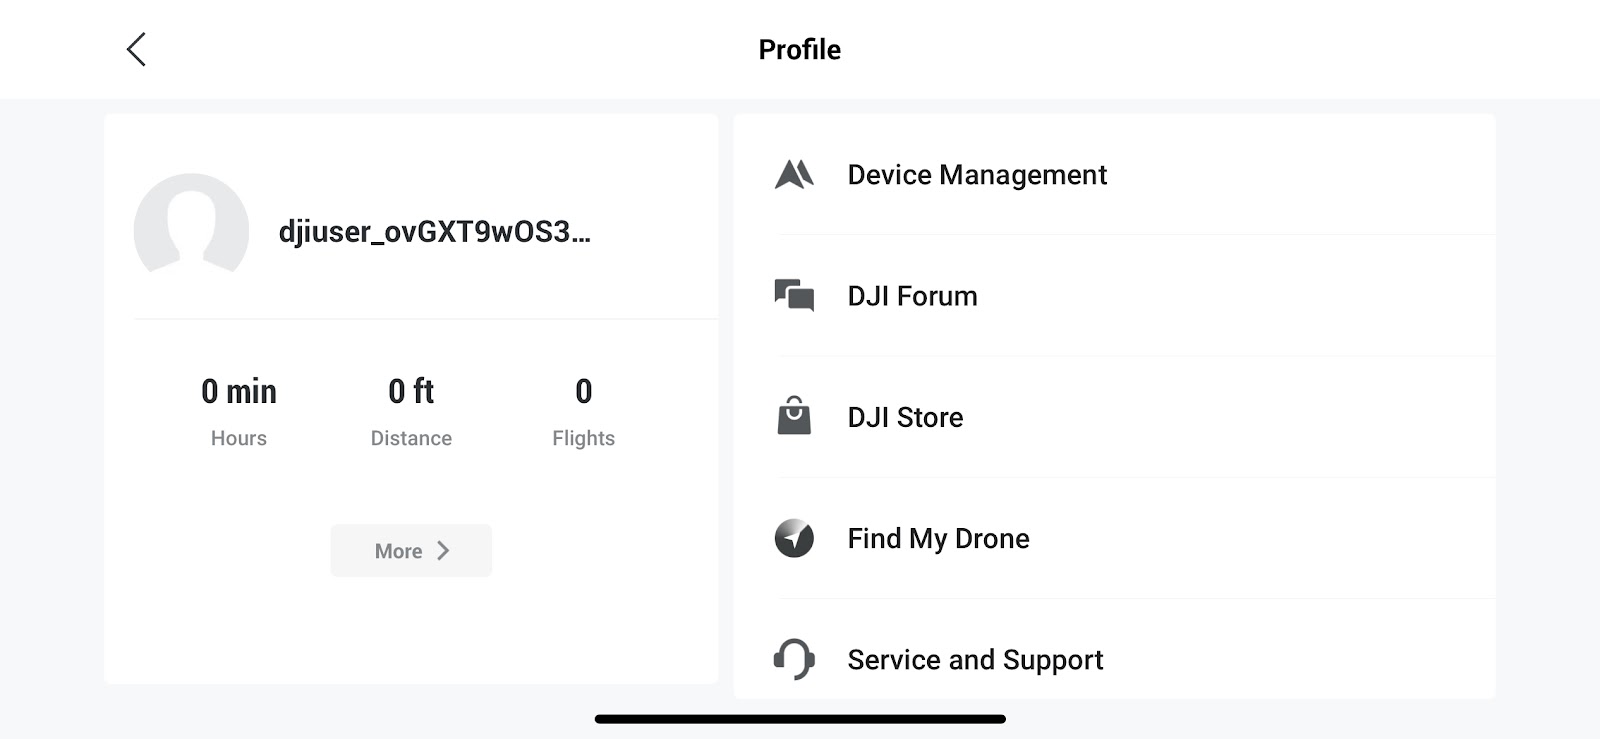
STEP 6: To vary your identify and profile image, faucet your present djiuser_ identify (this may deliver you to the Profile particulars web page, and you’ll change your DJI username to no matter you’d like, in addition to add a profile image.