

Tiny whoops are standard amongst FPV pilots for his or her compact dimension and agility, making them extremely enjoyable for indoor flying and tight areas. Nonetheless, getting the very best efficiency out of your tiny whoop requires fine-tuning varied settings in Betaflight, Bluejay, FPV, and your radio. On this tutorial, I’ll share some suggestions and information you thru the optimum configurations that can assist you get probably the most out of your tiny whoop.


Don’t neglect to take a look at these nice equipment for tiny whoops: https://oscarliang.com/best-tiny-whoop/
Use BT2.0 or A30 Connectors
As examined, BT2.0 and A30 has considerably higher efficiency than PH2.0, much less voltage sag and extra flight time. If you’re nonetheless utilizing PH2.0, it’s time to interchange them. BT2.0 and A30 has comparable efficiency, and they’re additionally appropriate so it doesn’t actually matter an excessive amount of which connector to get.
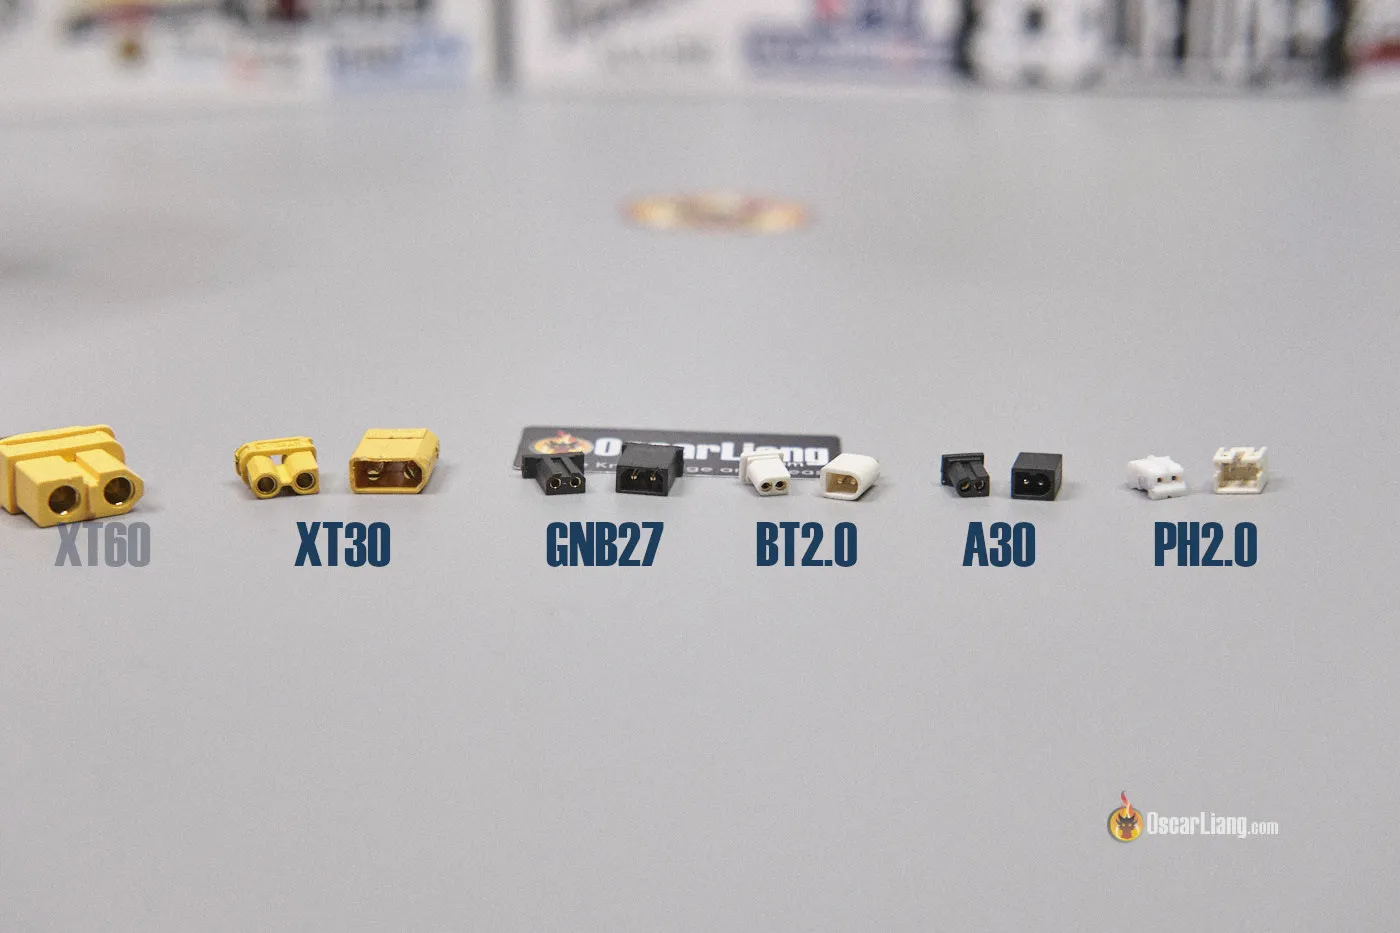
Buy BT2.0 and A30 connectors right here: https://oscarliang.com/best-tiny-whoop/#LiPo-Battery-Connectors
FPV System Setup
If you’re flying indoors, there’s often little have to run greater than 25mW energy in your VTX. This maximizes your flight time and reduces VTX overheating.
It’s frequent to have a 5GHz WiFi router in the home, so selecting a VTX channel that’s removed from the WiFi frequency band may improve your video high quality, e.g., Raceband channel 8. For extra recommendations on selecting FPV channels: https://oscarliang.com/fpv-channels/

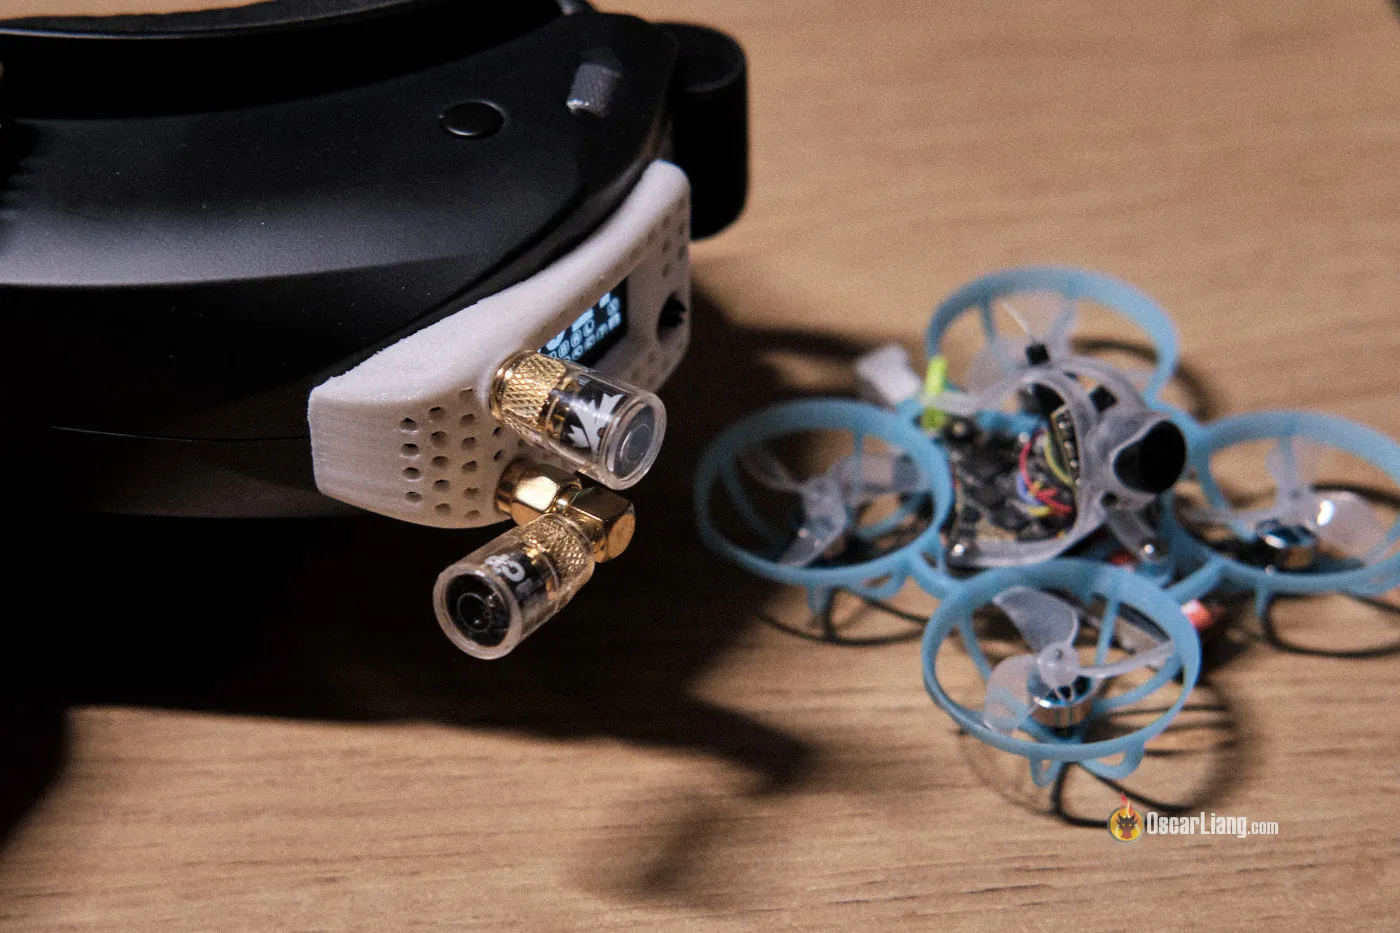
For comfort, I often use two stubby antennas on my FPV Goggles, pointing at 90-degree to one another. They’re lighter and extra compact. The polarization path (RHCP or LHCP) often doesn’t matter as most Tiny Whoops use a light-weight dipole antenna, which is linearly polarized. In case you don’t know what to decide on, RHCP is a extra standard alternative for analog FPV. See my antenna suggestions: https://oscarliang.com/best-fpv-antenna/#Antennas-for-VRX-and-FPV-Goggles
Radio Hyperlink Setup
Assuming you might be flying indoors and utilizing an ExpressLRS radio hyperlink, take into account selecting the bottom energy stage, e.g., 25mW or 10mW if accessible. This may significantly enhance your radio battery life.

In terms of packet charges, think about using 500Hz and even F1000Hz for minimal latency. Nonetheless, for most individuals, it’s troublesome to even discover the latency distinction between 150Hz and 500Hz, so it’s not an enormous deal in apply.
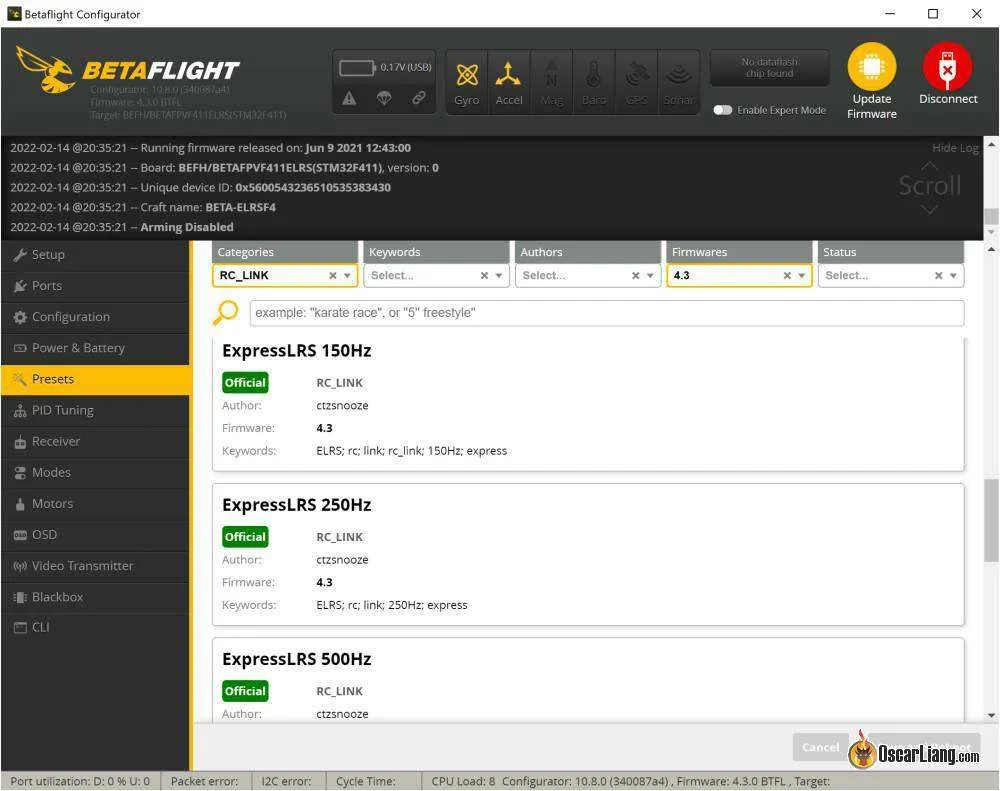
Personally, I simply use 250Hz for all my quads to maintain issues constant. Packet price is a worldwide setting, not a per-model setting, so in case you use totally different charges for various fashions, you would need to change it within the ExpressLRS LUA script each time earlier than flying. That may change into fairly annoying.
Don’t neglect to use the ExpressLRS preset in Betaflight based on your particular packet price, in any other case it may introduce undesirable vibrations.
Flashing Bluejay Firmware
It’s extremely really useful to flash Bluejay to your ESC for 2 causes:
- It permits greater PWM frequency.
- It permits bi-directional DShot, which permits RPM filters in Betaflight.
Hottest whoops just like the Air65 and NewBeeDrone already include Bluejay firmware, so that you don’t have to fret about this.
Comply with my tutorial on the right way to flash Bluejay: https://oscarliang.com/bluejay-blheli-s/

Select a PWM frequency that fits your wants. 24KHz supplies higher motor efficiency, resulting in extra responsive and exact management, whereas 96KHz maximizes flight time. 48KHz supplies a superb stability between responsiveness and effectivity. I examined totally different PWM frequencies on my BetaFPV Air65, and listed below are the flight occasions:
- 96KHz: 4:00
- 48KHz: 3:40
- 24KHz: 2:50
You’ll be able to change PWM frequency by re-flashing the firmware.
Personally I feel 96KHz is an effective choice to get the longest doable flight time. If you would like snappier motor response, you’ll be able to strive decrease frequencies, however not like you might be racing on knowledgeable stage you won’t even discover the distinction.
Props In vs Props Out
Props in and props out consult with the motor spin path and propeller mounting. I’ve a tutorial explaining it in additional element: https://oscarliang.com/reversed-motor-prop-rotation-quadcopter/
Props in is the default configuration in Betaflight, however props out is extra standard on whoops as a result of it tends to scale back yaw washout and customarily leads to higher flight efficiency.
In case you expertise washout throughout corners or descents, making an attempt the alternative configuration can generally enhance the problem. Don’t simply take my phrase for it — experiment with each setups and see what works greatest on your flying model and setup.

Digicam Angle
In case you discover the drone troublesome to regulate and it at all times feels prefer it’s making an attempt to run away quicker than you’ll be able to handle, strive decreasing the digicam angle by shifting the digicam to a decrease screw gap on the cover.

In case you’re already utilizing the bottom digicam angle accessible, you’ll be able to cut back it even additional by doing one thing like this.

Betaflight Configuration
Angle Mode vs. Acro Mode
I used to fly principally in Angle mode, however currently I’ve been flying an increasing number of in Acro mode as a result of it permits me to fly quicker and extra easily.
Some pilots nonetheless favor Angle mode for a number of causes:
- Ease of Management: Angle mode routinely ranges the quad when the sticks are centered, making it simpler to regulate — particularly in tight indoor areas.
- Self-Righting: After hitting an impediment, the quad rapidly stabilizes itself, permitting for quicker restoration and steady flight.
- Precision: Stick deflection instantly corresponds to the lean angle of the quad, which may really feel extra predictable and managed, notably for racing situations.
In case you’re simply beginning out, it’s completely fantastic to stay with Angle mode. Nonetheless, if you wish to push your lap occasions and problem your self to fly quicker, Acro mode is the way in which to go. Simply bear in mind that it’s considerably more durable to regulate and requires apply to grasp.
Angle Mode Settings
- Angle Energy: 75 (greater power = extra stabilization. If management is just too stiff, cut back this quantity).
- Angle Restrict: 60 (This controls how a lot tilt you are able to do in Angle mode earlier than it limits it, type of like your charges in Angle mode. The upper, the extra responsive and twitchy your management is)
My Whoop Charges (Acro Mode)
Pitch/Roll
- Heart Sensitivity: 250
- Max Charge: 1100
- Expo: 0.55
Yaw
- Heart Sensitivity: 300
- Max Charge: 900
- Expo: 0.55
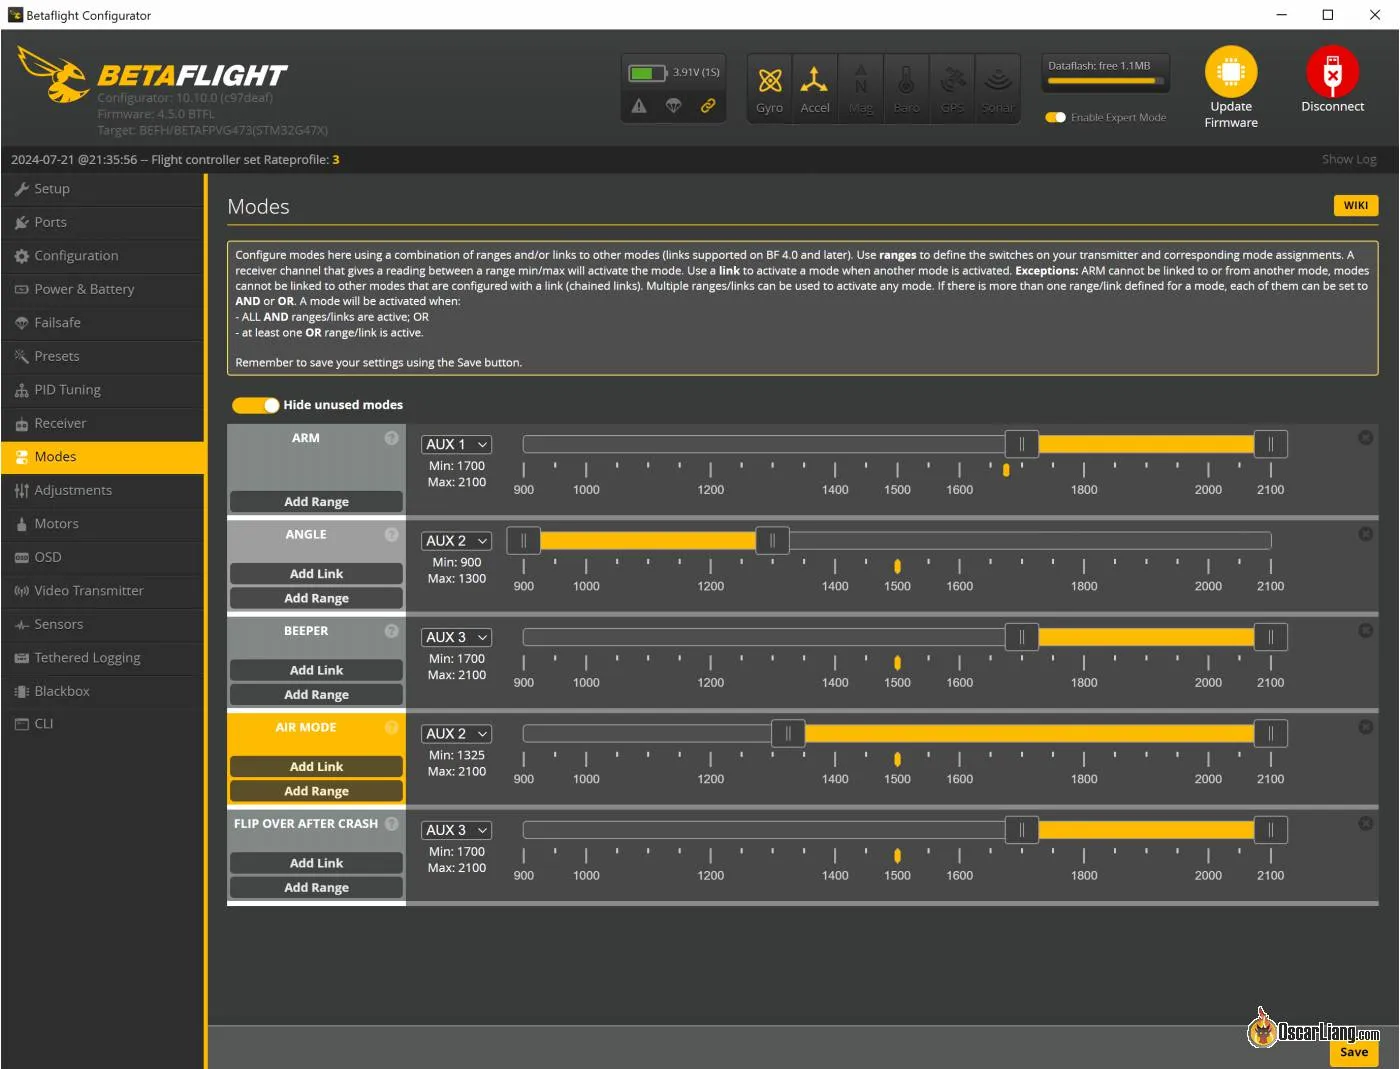
Disabling Airmode
I usually disable Airmode within the Configuration tab when flying in Angle mode. This helps with crashing; the whoop doesn’t overreact and freak out, permitting simpler restoration.
In case you fly in Acro mode, you’ll be able to assign Airmode to the identical change as Angle mode in order that while you deactivate Angle mode, Airmode is activated.
Additional Studying: What does airmode do? https://oscarliang.com/betaflight-airmode/
Throttle Scaling vs. Motor Output

In case your whoop feels too highly effective, take into account decreasing its energy utilizing Throttle Scale.
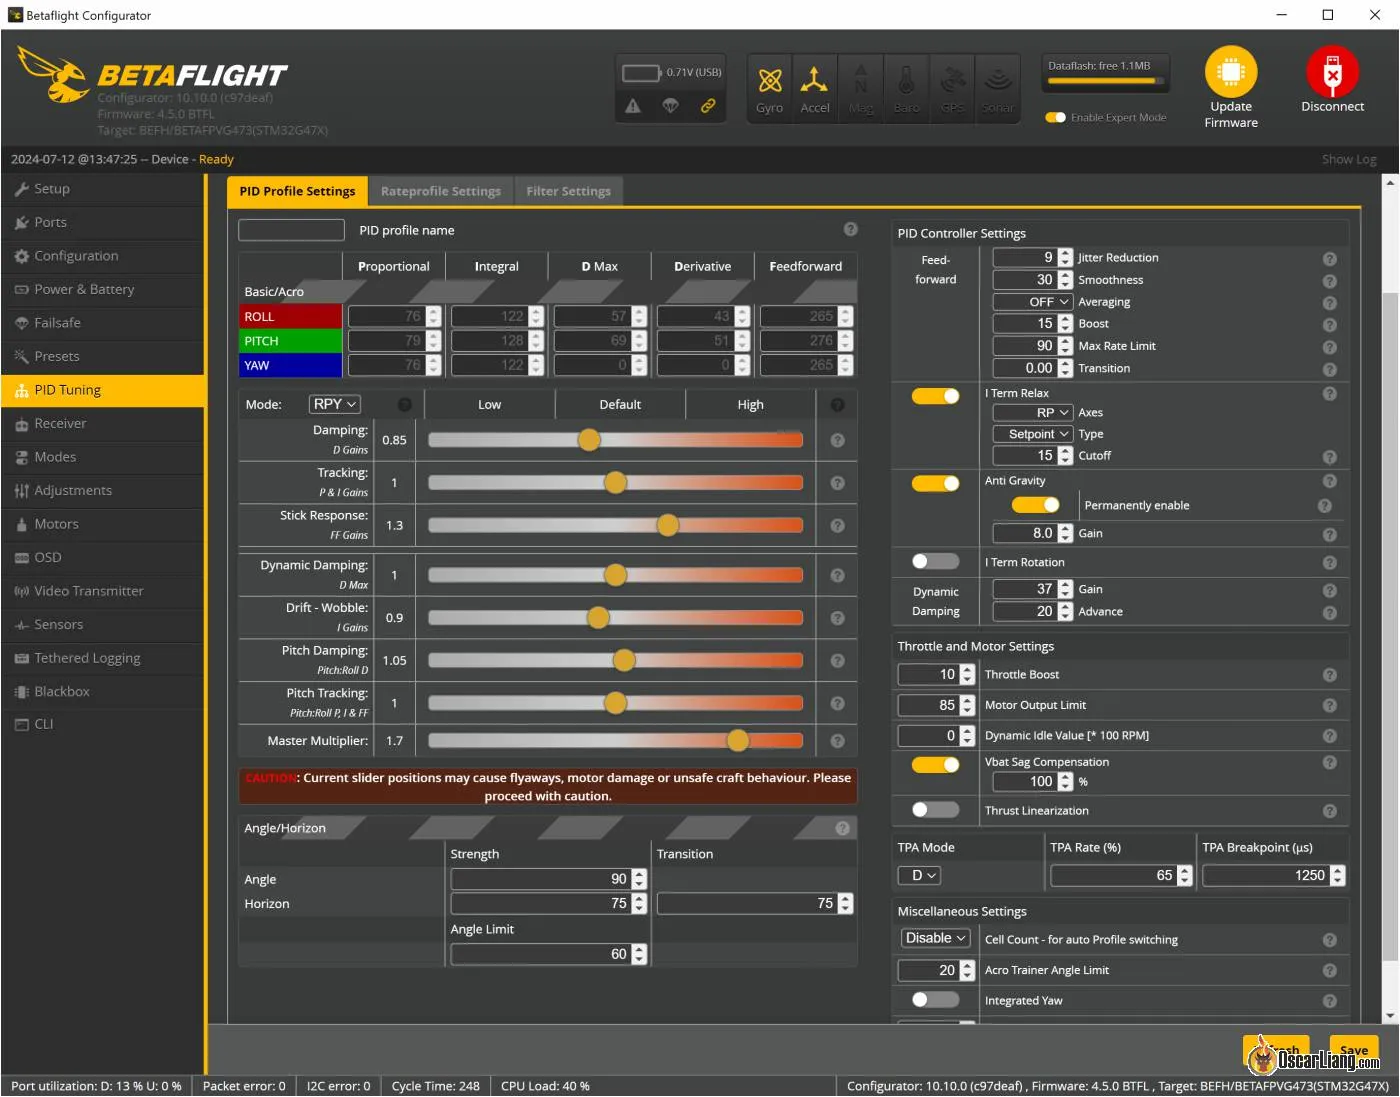
Within the PID Tuning tab, Rateprofile Settings, set Throttle Restrict to SCALE, then cut back it to 90%, and even decrease for relaxed cruising.
Keep away from decreasing Motor Output Restrict as a substitute. Whereas it will probably additionally cut back the drone’s velocity, it decreases your drone’s general responsiveness. Utilizing Throttle Scale limits most throttle enter with out proscribing motor authority, so you retain full responsiveness whereas decreasing high velocity.
In different phrases, you’re not shedding flight efficiency by scaling throttle — the motors can nonetheless attain 100% energy when wanted to stabilize the quad. That is totally different from Motor Output Restrict, which caps how briskly the motors can spin and might make your whoop really feel much less responsive.
Throttle Expo
Setting throttle expo helps you fly exactly indoor. All people and each quad would require barely totally different throttle expo because it is dependent upon your regular cruise velocity, what you need for throttle mid, so it’s essential regulate it your self.
For my Air65 II Champion whoop, right here’s my setting:
- Throttle Mid: 0.28
- Throttle Expo: 0.65
Different Settings
- VBAT Sag Compensation: 100% (Makes the quad really feel extra constant by means of the entire battery pack but additionally extra dangerous as you may neglect when to land).
- Thrust Linearization: 10%.
- Motor Idle: 8% to 10% (Within the Motors Tab). Or use Dynamic Idle.
- Battery Voltage Settings: Set the Minimal Cell Voltage to three.2V and the Warning Cell Voltage to three.3V within the Energy & Battery tab. This ensures you don’t over-discharge your batteries. Set Max voltage to 4.4V.
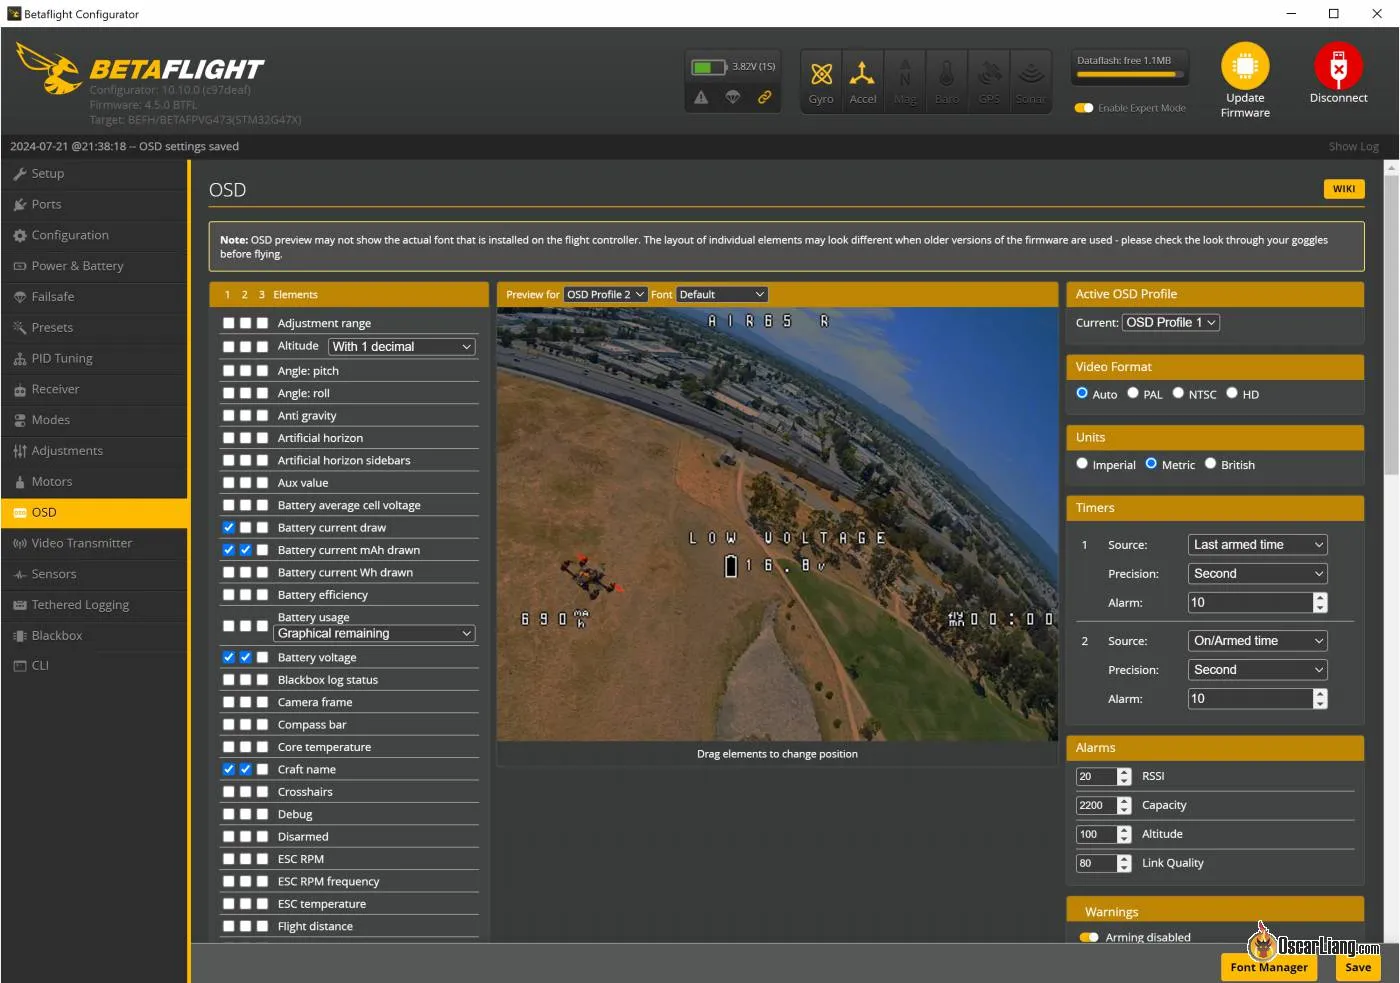
- OSD Setup: Run a minimal OSD setup with solely important components like battery voltage, flight time, and warnings to keep away from distractions.
Allow Crash Restoration in Betaflight
It is a will need to have function for whoops, be sure to allow it as a result of most BNF whoops include this function disabled.
What’s Crash Restoration
Crash Restoration is a function in Betaflight that helps your quadcopter stabilize itself after hitting an impediment. This function may be notably useful for Tiny Whoop pilots, particularly these flying in tight areas or taking part in races. When enabled, Crash Restoration permits the flight controller to appropriate the quadcopter’s place quicker than human reflexes can, making it simpler to regain management and proceed flying.
Why Use Crash Restoration?
Crash Restoration can considerably improve your flying expertise by:
- Computerized Self-Righting: When your quadcopter hits an impediment, the flight controller makes use of the motors to convey it again to a secure place rapidly.
- Decreased Downtime: By routinely correcting the quad’s place, you’ll be able to keep away from the necessity to use turtle mode or decide up the quad after a crash.
- Improved Flight Efficiency: Particularly helpful for tiny whoops in indoor environments, the place crashes are extra frequent because of confined areas.
The right way to Allow Crash Restoration
To allow Crash Restoration in Betaflight, comply with these steps:
Open the Betaflight Configurator. Go to the CLI tab. Kind the next command:
set crash_recovery = ONset crash_dthreshold = 80set crash_gthreshold = 600set crash_setpoint_threshold = 500set crash_recovery_rate = 150save
Tuning Crash Restoration Settings
Betaflight supplies a number of parameters to fine-tune the Crash Restoration function, guaranteeing it performs optimally with out false triggers. It’s loads of absorb, in case you don’t wish to undergo this, I feel the default works fairly properly for tiny whoops, you don’t essentially have to vary any settings until it’s inflicting you a problem.
- crash_recovery: Allows or disables Crash Restoration. You can too set it to “beep” to check the function with out precise restoration actions, however not helpful for quads with out a buzzer, equivalent to a tiny whoop.
- crash_dthreshold, crash_gthreshold, crash_setpoint_threshold: These parameters management the sensitivity of Crash Restoration. Adjusting these may also help forestall false triggers:
-
- crash_setpoint_threshold: Based mostly in your stick place, this prevents restoration from triggering throughout intentional flips or rolls.
- crash_gthreshold: Based mostly on gyro readings, this units the rotational velocity threshold to set off restoration.
- crash_dthreshold: Based mostly on D-term values, this detects when the quad is genuinely uncontrolled.
-
- crash_delay, crash_time: These parameters add a delay between detecting a crash and initiating restoration:
- crash_delay: Time in milliseconds to attend earlier than beginning restoration.
- crash_time: Most period for which restoration makes an attempt will likely be made.
- crash_recovery_rate: Controls how aggressively the quadcopter makes an attempt to get well. Greater values imply quicker restoration however can result in oscillations if set too excessive.
set crash_recovery_rate = 100 - crash_limit_yaw: Limits the yaw price throughout restoration to forestall spins.
set crash_limit_yaw = 200 - crash_recovery_angle: Defines the angle to which the quadcopter will attempt to get well.
set crash_recovery_angle = 10
Hold Your Charges Constant
My final piece of recommendation for novices is to maintain your charges constant. It doesn’t matter whether or not you’re flying indoors or outside, or piloting a robust quad or a gradual one — having the identical charges and dealing with traits is the way you enhance over time.
Each time you alter your charges, it’s essential spend time getting used to the brand new really feel. Protecting your charges constant helps you construct muscle reminiscence and progress quicker as a pilot.
It’s completely fantastic to experiment with totally different charges whereas determining what works greatest for you. However with regards to training and bettering your abilities, consistency is vital.
Conclusion
Organising your Tiny Whoop with these configurations and suggestions will considerably improve your flying expertise. Bear in mind, these are beginning factors, and also you may have to fine-tune settings primarily based in your particular {hardware} and flying model. Comfortable flying!
Edit Historical past
- July 2024 – information created
- Feb 2026 – up to date